When testing your Flutter application with Perfecto, the following assumptions apply:
-
You build your own application and should have two
.apkfiles: one for the real application and one for the test application. -
Running the Perfecto Gradle Plugin is best done outside of the source code folder. The application can reside in the cloud, in Git/NAS, and so on.
-
Running the Perfecto Gradle Plugin requires Gradle.
-
Running Gradle requires a gradle wrapper along with the following two files:
-
build.gradle(to allow running the plugin, not to build the application) -
A config file in JSON format
-
-
You reference the
build.gradlefile and the JSON config file through CLI params. It is good practice to keep both files in the folder from where you run the gradle wrapper.
Watch this video to see a demo of the Perfecto-Flutter integration setup for Android. Detailed steps follow.
On this page:
Prerequisites
Before you get started, make sure you have installed the following:
- Gradle
- Java
- Flutter
-
Gradle plugin
You can download the Gradle Plugin either automatically, after adding the required lines of code to the
build.gradlefile, as described in step 2 below, or, if your organization does not permit direct download, by pre-downloading it to a locallibsfolder (see also Install the Perfecto Gradle plugin manually).
1 | Get started
The starting point is the following Flutter project: https://github.com/PerfectoMobileSA/PerfectoFlutterSample
We will use the following tests for integration testing: https://github.com/PerfectoMobileSA/PerfectoFlutterSample/tree/main/testing_app/integration_test
Flutter projects are integrated with Gradle and include several build.gradle files – one at the project level and one for each application.
The following steps explain how to get started with Flutter using Android Studio, but you can use any other preferred IDE that supports Flutter. For the latest published information about Android Studio, see https://developer.android.com/studio/intro.
To get started:
-
Clone the project: https://github.com/PerfectoMobileSA/PerfectoFlutterSample
-
(Optional) If you want to browse the project, open it in Android Studio or any other IDE of your choice that supports Flutter.
-
Open a terminal window in the root folder
testing_app. -
Execute the following command:
Copyflutter test integration_test/app_test.dartThis will run the
app_test.dartfile and let you see the results on the screen.Important: If no Android device is connected to your Mac, you are prompted to choose between Chrome and MacOS. Choosing Chrome will return an error. Choosing MacOS will trigger the test on Safari.If you do not specify the particular
.dartfile, Flutter will run all tests in theintegration_testfolder.Tip: For better log data generated on the application under test (AUT), consider adding the following empty methods in each test file in the group definition. These methods can be empty or include log statements.CopysetUpAll(() {
});
tearDownAll(() {
});
2 | Configure the project for Perfecto
In this step, we work with build configuration scripts called build.gradle. Flutter projects are integrated with Gradle and include several build.gradle files – one at the project level (in this case, testing_app/android/build.gradle) and one for each application (in this case, testing_app/android/app/build.gradle).
def localProperties = new Properties()
    def localPropertiesFile = rootProject.file('local.properties')
    if (localPropertiesFile.exists()) {
        localPropertiesFile.withReader('UTF-8') { reader ->
            localProperties.load(reader)
        }
    }


    def flutterRoot = localProperties.getProperty('flutter.sdk')
    if (flutterRoot == null) {
        throw new GradleException("Flutter SDK not found. Define location with flutter.sdk in the local.properties file.")
    }


    def flutterVersionCode = localProperties.getProperty('flutter.versionCode')
    if (flutterVersionCode == null) {
        flutterVersionCode = '1'
    }


    def flutterVersionName = localProperties.getProperty('flutter.versionName')
    if (flutterVersionName == null) {
        flutterVersionName = '1.0'
    }


    apply plugin: 'com.android.application'
    apply plugin: 'kotlin-android'
    apply from: "$flutterRoot/packages/flutter_tools/gradle/flutter.gradle"


    android {
        compileSdkVersion flutter.compileSdkVersion


        compileOptions {
            sourceCompatibility JavaVersion.VERSION_1_8
            targetCompatibility JavaVersion.VERSION_1_8
        }


        kotlinOptions {
            jvmTarget = '1.8'
        }


        sourceSets {
            main.java.srcDirs += 'src/main/kotlin'
        }


        defaultConfig {
            // TODO: Specify your own unique Application ID (https://developer.android.com/studio/build/application-id.html).
            applicationId "dev.flutter.testing_app"
            minSdkVersion flutter.minSdkVersion
            targetSdkVersion flutter.targetSdkVersion
            versionCode flutterVersionCode.toInteger()
            versionName flutterVersionName
        }


        buildTypes {
            release {
                // TODO: Add your own signing config for the release build.
                // Signing with the debug keys for now, so `flutter run --release` works.
                signingConfig signingConfigs.debug
            }
        }
    }


    flutter {
        source '../..'
    }


    dependencies {
        implementation "org.jetbrains.kotlin:kotlin-stdlib-jdk7:$kotlin_version"
    }
To configure the project for Perfecto:
-
(Optional) Open your app-level
build.gradlefile (in our example, this istesting_app/android/app/build.gradle) and make sure the following line is included in thedefaultConfigsection:CopytestInstrumentationRunner "androidx.test.runner.AndroidJUnitRunner" -
Save the file.
-
(Optional) Open your main test file (in our example, this is https://github.com/PerfectoMobileSA/PerfectoFlutterSample/blob/main/testing_app/android/app/src/androidTest/java/dev/flutter/testing_app/MainActivityTest.java) and make sure that the following line is included:
Copyimport dev.flutter.plugins.integration_test.FlutterTestRunner;If the following line appears instead, make sure to replace it with the expected line above:
Copyimport dev.flutter.plugins.e2e.FlutterTestRunner; -
Open a terminal window, navigate to the
androidfolder, and run the following command:Copygradle wrapper -
To build the required APKs, run the following commands.
 Mac
CopyTo build the app-debug-androidTest.apk wrapper file in the androidTest/debug folder:
Mac
CopyTo build the app-debug-androidTest.apk wrapper file in the androidTest/debug folder:./gradlew app:assembleDebug -Ptarget=integration_test/app_test.dartWindows
CopyTo build the app-debug-androidTest.apk wrapper file in the androidTest/debug folder:gradlew app:assembleDebug -Ptarget=integration_test/app_test.dartFor information on adding the Gradle Wrapper, see the Gradle documentation.
-
View the resulting APKS in the following folder:
build/app/outputs/apk
3 | Run the plugin and view the report
In this step, you create a Flutter configuration file, run the Perfecto Gradle plugin, and view the test report in Perfecto.
The JSON file holds all Perfecto configurations, including security information, the Perfecto cloud name, Smart Reporting information, and test data.
Expand a step to view its content.
In this step, you create the JSON text file that contains the configuration settings. This is the recommended practice. Configurations include the URL of the Perfecto lab, the security token, the devices to select, the tags to use, and the app to test.
In addition, you configure the build.gradle file that is located in the same folder as the JSON file.
-
Create a dedicated folder for the configuration file. This folder can reside outside of the current project. It does not need to be located in your source code.
-
To verify that you can run the project from a different location, add the Gradle Wrapper to the folder that you just created, as follows:
-
Open a command-line window.
-
To initiate Gradle, run the following command from the folder you created in step 1:
Copygradle init -
When prompted, select the options to create a basic project and to use Groovy as the build script DSL.
-
Press enter until the build finishes successfully. The folder should now include all relevant Gradle files, including a
build.gradlefile. You will edit this file later. -
To add the Gradle Wrapper, run the following command:
Copygradle wrapper
-
-
In the folder that you created in step 1, create a configuration file (
configFile.json) as a JSON text file.Sample configuration file for Mac (click to view)
Copy{
"cloudURL": "<cloud_id>.perfectomobile.com",
"securityToken": "<TOKEN>",
"devices": [
{
"platformName" : "Android",
"platformVersion": "^12.*",
"description": "free"
},
{
"platformName" : "Android",
"platformVersion": "^11.*",
"description": "free"
}
],
"jobName": "Flutter_job",
"jobNumber": 1,
"branch": "Flutter_branch",
"projectName": "My_Flutter_project",
"projectVersion": "v1.0",
"tags": ["flutter", "gradleplugin"],
"apkPath": "Users/<user>/Documents/N/Flutter6/PerfectoFlutterSample-main/testing_app/build/app/outputs/apk/debug/app-debug.apk",
"testApkPath": "Users/<user>/Documents/N/Flutter6/PerfectoFlutterSample-main/testing_app/build/app/outputs/apk/androidTest/debug/app-debug-androidTest.apk",
"installationDetails" : {"preCleanUp" : "true"},
"postExecution" : {"uninstall" : "false" },
"debug": false,
"failBuildOnFailure": false,
"takeScreenshotOnTestFailure": true,
"shard": false,
"testTimeout" : 60000
}Sample configuration file for Windows (click to view)
Copy{
"cloudURL": "<cloud_id>.perfectomobile.com",
"securityToken": "<TOKEN>",
"devices": [
{
"platformName" : "Android",
"platformVersion": "^12.*"
},
{
"platformName" : "Android",
"platformVersion": "^11.*"
}
],
"jobName": "Flutter_Android_Job",
"jobNumber": 1,
"branch": "Flutter_branch",
"projectName": "My_Flutter_project",
"projectVersion": "v1.0",
"tags": ["flutter", "gradleplugin"],
"apkPath": "C:/Flutter/PerfectoFlutterSample-main/testing_app/build/app/outputs/apk/debug/app-debug.apk",
"testApkPath": "C:/Flutter/PerfectoFlutterSample-main/testing_app/build/app/outputs/apk/androidTest/debug/app-debug-androidTest.apk",
"installationDetails" : {"preCleanUp" : "true"},
"postExecution" : {"uninstall" : "false" },
"debug": false,
"failBuildOnFailure": false,
"takeScreenshotOnTestFailure": true,
"shard": false,
"testTimeout" : 60000
}where:
cloudURLis the URL of the Perfecto lab to connect to, but without the.appnotation. For example: mobilecloud.perfectomobile.com (but not mobilecloud.app.perfectomobile.com)securityTokenis the tester's personal security token for the Perfecto Lab. See also Generate security tokens.devicesspecifies the devices that the application will run on. The above example specifies an Android device of version 10, 11, and 12 (using a regular expression). For more information on selecting different devices or specifying other options, see Device selection parameters.-
Reporting parameters:
jobNamejobNumberis the CI job number of the build.branchis the job branch as reported in the execution context.projectNameis the name of the project, for classification.projectVersionis the version number assigned to the project for this build.tagsis the set of tags to associate with the execution.
apkPathrefers to the path of the.apkfile for the application under test.See also Format of apkPath, testApkPath, and androidAppPath values.testApkPathis the path to the.apkfile representing the UI test application runner for the application under test. See also Format of apkPath, testApkPath, and androidAppPath values.
This example uses the debug app (not the release app) because the app is used during the development stage.
For more information, see Android configuration parameters for the Gradle Plugin.
-
Edit the file as follows:
-
Add the values for the connection parameters
cloudURLandsecurityTokento the configuration file. -
(Optional) Add the reporting parameter settings to add tags to the execution report. For more information on adding tags, see Tag-driven reports (RTDD workflow).
-
Add the application parameters to identify where the application files are located.
When testing an Android (aar or jar) library, set both the apkPath and testApkPath fields to the location specified for the assembleAndroidTest gradle task. By default, this location is: <project folder>/app/build/outputs/apk/androidTest/debug/app-debug-androidTest.apk. You can supply additional parameters if you need to limit the test application to only execute specific methods or classes.
If your file resides in a different location, you need to change the path accordingly.
You can also store your files in the Perfecto cloud. For more information, see Format of apkPath, testApkPath, and androidAppPath values.
-
-
Save the configuration file.
-
Open the
build.gradlefile that is located in the same folder as the configuration file. -
If you use Maven, use the example available here.
Example build.gradle file (click to view)
Copybuildscript {
repositories {
jcenter()
maven {
url "https://repo1.perfectomobile.com/public/repositories/maven"
}
}
dependencies {
classpath "com.perfectomobile.instrumentedtest.gradleplugin:plugin:+"
}
}
apply plugin: 'com.perfectomobile.instrumentedtest.gradleplugin'
perfectoGradleSettings {
configFileLocation "configFile.json"
}For more information, see Add the Perfecto plugin dependency to your build.gradle file in our Espresso article.
-
If you need to use a local repository, download the Perfecto Gradle plugin manually.
Example build.gradle file (click to view)
Copybuildscript {
repositories {
jcenter()
flatDir {
dirs '/path_to_JAR_file/'
}
}
dependencies {
classpath "com.perfectomobile.instrumentedtest.gradleplugin:plugin:+"
}
}
apply plugin: 'com.perfectomobile.instrumentedtest.gradleplugin'
perfectoGradleSettings {
configFileLocation "configFile.json"
}
-
Open the
build.gradlefile that is located in the same folder as the configuration file. -
If you use Maven, use the example available here.
Example build.gradle file (click to view)
Copybuildscript {
repositories {
jcenter()
maven {
url "https://repo1.perfectomobile.com/public/repositories/maven"
}
}
dependencies {
classpath "com.perfectomobile.instrumentedtest.gradleplugin:plugin:+"
}
}
apply plugin: 'com.perfectomobile.instrumentedtest.gradleplugin'
perfectoGradleSettings {
configFileLocation "configFile.json"
}For more information, see Add the Perfecto plugin dependency to your build.gradle file in our Espresso article.
-
If you need to use a local repository, download the Perfecto Gradle plugin manually.
Example build.gradle.file (click to view)
Copybuildscript {
repositories {
jcenter()
flatDir {
dirs "C:/Flutter/libs/"
}
}
dependencies {
classpath "com.perfectomobile.instrumentedtest.gradleplugin:plugin:22.5"
}
}
apply plugin:'com.perfectomobile.instrumentedtest.gradleplugin'
perfectoGradleSettings {
configFileLocation "configFile.json"
}
-
To execute the plugin, run the following command:
Here we also supply the full path to the configuration file created in step 3. You can add other application parameters (except for device selection) to the command as needed.
This will:
- Select the devices as specified in the Device selection parameters of the configuration file (or a random device if no specification is provided).
- Install the application and test .apk files onto the device.
- Run the test methods (based on the configuration parameters).
- Send output to the console window.
- Generate an execution report that can be viewed in the Test analysis with Smart Reporting interface.
The command-line parameters can set any of the configuration parameters, except for device selection parameters. For more information, see Android configuration parameters for the Gradle Plugin.
For information on running the Gradle plugin over a proxy connection, see Proxy connection.
During the execution, the plugin reports on the progress of the execution and the completion of each test method to the command-line window.
./gradlew perfecto-android-inst -PconfigFileLocation=configFile.json
:perfecto-android-inst
Parsing configuration file: configFile.json

Parsed configuration file configFile.json successfully


Starting Execution

Your management id is: *******-****-****-****-**********

You can view your test results in real time at:
https://<cloud>.reporting.perfectomobile.com/reporting/library?tags[0]=*******-****-****-****-**********

Acquiring device based on device management info {"platformName":"Android","platformVersion":"^12.*"}

Acquiring device based on device management info {"platformName":"Android","platformVersion":"^11.*"}

Device: <<DEVICE ID>>  Samsung Galaxy Tab S8 Ultra: Operating on device {"deviceId":"<<DEVICE ID>> ","osVersion":"12","screenResolution":"1848*2960","location":"**-**-***","manufacturer":"Samsung","model":"Galaxy Tab S8 Ultra","firmware":"gts8uwifixx-user 12 SP1A.210812.016 X900XXU1AVAA release-keys","distributor":"Screencopy","description":"free","selectionCriteria":{"platformVersion":"^12.*","platformName":"Android"},"os":"Android"} according to device details {"platformName":"Android","platformVersion":"^12.*","index":1}

Acquiring device based on device management info {"platformName":"Android","platformVersion":"^10.*"}

Device: <<DEVICE ID>>  Samsung Galaxy Tab S8 Ultra: Uploading APK to device server

Device: <<DEVICE ID>>  Samsung Galaxy Tab S8 Ultra: Completed uploading APK to device server

Device: <<DEVICE ID>>  Zebra TC52: Operating on device {"deviceId":"<<DEVICE ID>> ","osVersion":"10","screenResolution":"720*1280","location":"**-**-***","manufacturer":"Zebra","model":"TC52","firmware":"TC52-user 10 10-12-13.00-QN-U00-STD-HEL-04 50 release-keys","distributor":"Screencopy","description":"free","selectionCriteria":{"platformVersion":"^10.*","platformName":"Android"},"os":"Android"} according to device details {"platformName":"Android","platformVersion":"^10.*","index":3}

Device: <<DEVICE ID>>  Zebra TC52: Uploading APK to device server

Device: <<DEVICE ID>>  Zebra TC52: Completed uploading APK to device server

Device: <<DEVICE ID>>  Samsung Galaxy Tab S8 Ultra: Starting video recording

Device: <<DEVICE ID>>  Samsung Galaxy Tab S8 Ultra: Enabling instrumented test mode

Device: <<DEVICE ID>>  Samsung Galaxy Tab S8 Ultra: Trying to uninstall package dev.flutter.testing_app from device

Device: <<DEVICE ID>>  Samsung Galaxy Tab S8 Ultra: Uninstalled package dev.flutter.testing_app unsuccessfully

Device: <<DEVICE ID>>  Samsung Galaxy Tab S8 Ultra: Trying to uninstall package dev.flutter.testing_app.test from device

Device: <<DEVICE ID>>  Samsung Galaxy Tab S8 Ultra: Uninstalled package dev.flutter.testing_app.test unsuccessfully

Device: <<DEVICE ID>>  Samsung Galaxy Tab S8 Ultra: Installed APK successfully

Device: <<DEVICE ID>>  Samsung Galaxy Tab S8 Ultra: Installed test APK successfully

Device: <<DEVICE ID>>  Samsung Galaxy Tab S8 Ultra: Starting execution of package dev.flutter.testing_app.test with test runner androidx.test.runner.AndroidJUnitRunner

Device: <<DEVICE ID>>  Samsung Galaxy Tab S8 Ultra: Installing AndroidX orchestrator

Device: <<DEVICE ID>>  Samsung Galaxy Tab S8 Ultra: Trying to uninstall package androidx.test.services from device

Device: <<DEVICE ID>>  Samsung Galaxy Tab S8 Ultra: Uninstalled package androidx.test.services unsuccessfully

Device: <<DEVICE ID>>  Samsung Galaxy Tab S8 Ultra: Trying to uninstall package androidx.test.orchestrator from device

Device: <<DEVICE ID>>  Samsung Galaxy Tab S8 Ultra: Uninstalled package androidx.test.orchestrator unsuccessfully

Device: <<DEVICE ID>>  Google Pixel 4a: Operating on device {"deviceId":"<<DEVICE ID>> ","osVersion":"11","screenResolution":"1080*2340","location":"**-**-***","network":"*******","manufacturer":"Google","model":"Pixel 4a","firmware":"sunfish-user 11 RP1A.200720.011 6746289 release-keys","distributor":"Screencopy","description":"Free","selectionCriteria":{"platformVersion":"^11.*","platformName":"Android"},"os":"Android"} according to device details {"platformName":"Android","platformVersion":"^11.*","index":2}

Device: <<DEVICE ID>>  Google Pixel 4a: Uploading APK to device server

Device: <<DEVICE ID>>  Samsung Galaxy Tab S8 Ultra: Completed installing AndroidX orchestrator

Device: <<DEVICE ID>>  Zebra TC52: Starting video recording

Device: <<DEVICE ID>>  Zebra TC52: Enabling instrumented test mode

Device: <<DEVICE ID>>  Zebra TC52: Trying to uninstall package dev.flutter.testing_app from device

Device: <<DEVICE ID>>  Zebra TC52: Uninstalled package dev.flutter.testing_app unsuccessfully

Device: <<DEVICE ID>>  Zebra TC52: Trying to uninstall package dev.flutter.testing_app.test from device

Device: <<DEVICE ID>>  Zebra TC52: Uninstalled package dev.flutter.testing_app.test unsuccessfully

Device: <<DEVICE ID>>  Zebra TC52: Installed APK successfully

Device: <<DEVICE ID>>  Zebra TC52: Installed test APK successfully

Device: <<DEVICE ID>>  Zebra TC52: Starting execution of package dev.flutter.testing_app.test with test runner androidx.test.runner.AndroidJUnitRunner

Device: <<DEVICE ID>>  Zebra TC52: Installing AndroidX orchestrator

Device: <<DEVICE ID>>  Zebra TC52: Trying to uninstall package androidx.test.services from device

Device: <<DEVICE ID>>  Zebra TC52: Uninstalled package androidx.test.services successfully

Device: <<DEVICE ID>>  Zebra TC52: Trying to uninstall package androidx.test.orchestrator from device

Device: <<DEVICE ID>>  Zebra TC52: Uninstalled package androidx.test.orchestrator successfully

Device: <<DEVICE ID>>  Zebra TC52: Completed installing AndroidX orchestrator

Device: <<DEVICE ID>>  Google Pixel 4a: Completed uploading APK to device server

Device: <<DEVICE ID>>  Samsung Galaxy Tab S8 Ultra: TestResult{className: dev.flutter.testing_app.MainActivityTest, methodName: Testing IconButtons, status: PASS}

Device: <<DEVICE ID>>  Samsung Galaxy Tab S8 Ultra: TestResult{className: dev.flutter.testing_app.MainActivityTest, methodName: Testing remove button, status: PASS}

Device: <<DEVICE ID>>  Samsung Galaxy Tab S8 Ultra: TestResult{className: dev.flutter.testing_app.MainActivityTest, methodName: Finding an item in the list, status: PASS}

Device: <<DEVICE ID>>  Samsung Galaxy Tab S8 Ultra: TestResult{className: dev.flutter.testing_app.MainActivityTest, methodName: Verifying whether item gets added to favorites, status: PASS}

Device: <<DEVICE ID>>  Google Pixel 4a: Starting video recording

Device: <<DEVICE ID>>  Google Pixel 4a: Enabling instrumented test mode

Device: <<DEVICE ID>>  Samsung Galaxy Tab S8 Ultra: Trying to uninstall package dev.flutter.testing_app from device

Device: <<DEVICE ID>>  Samsung Galaxy Tab S8 Ultra: Uninstalled package dev.flutter.testing_app successfully

Device: <<DEVICE ID>>  Samsung Galaxy Tab S8 Ultra: Trying to uninstall package dev.flutter.testing_app.test from device

Device: <<DEVICE ID>>  Samsung Galaxy Tab S8 Ultra: Uninstalled package dev.flutter.testing_app.test successfully

Device: <<DEVICE ID>>  Samsung Galaxy Tab S8 Ultra: Disabling instrumented test mode

Device: <<DEVICE ID>>  Google Pixel 4a: Trying to uninstall package dev.flutter.testing_app from device

Device: <<DEVICE ID>>  Google Pixel 4a: Uninstalled package dev.flutter.testing_app unsuccessfully

Device: <<DEVICE ID>>  Google Pixel 4a: Trying to uninstall package dev.flutter.testing_app.test from device

Device: <<DEVICE ID>>  Google Pixel 4a: Uninstalled package dev.flutter.testing_app.test unsuccessfully

Device: <<DEVICE ID>>  Google Pixel 4a: Installed APK successfully

Device: <<DEVICE ID>>  Google Pixel 4a: Installed test APK successfully

Device: <<DEVICE ID>>  Google Pixel 4a: Starting execution of package dev.flutter.testing_app.test with test runner androidx.test.runner.AndroidJUnitRunner

Device: <<DEVICE ID>>  Google Pixel 4a: Installing AndroidX orchestrator

Device: <<DEVICE ID>>  Google Pixel 4a: Trying to uninstall package androidx.test.services from device

Device: <<DEVICE ID>>  Google Pixel 4a: Uninstalled package androidx.test.services unsuccessfully

Device: <<DEVICE ID>>  Google Pixel 4a: Trying to uninstall package androidx.test.orchestrator from device

Device: <<DEVICE ID>>  Samsung Galaxy Tab S8 Ultra: Ending test execution

Device: <<DEVICE ID>>  Samsung Galaxy Tab S8 Ultra: Stopping video recording

Device: <<DEVICE ID>>  Google Pixel 4a: Uninstalled package androidx.test.orchestrator unsuccessfully

Device: <<DEVICE ID>>  Google Pixel 4a: Completed installing AndroidX orchestrator

Device: <<DEVICE ID>>  Zebra TC52: Trying to uninstall package dev.flutter.testing_app from device

Device: <<DEVICE ID>>  Zebra TC52: Uninstalled package dev.flutter.testing_app successfully

Device: <<DEVICE ID>>  Zebra TC52: Trying to uninstall package dev.flutter.testing_app.test from device

Device: <<DEVICE ID>>  Zebra TC52: TestResult{className: dev.flutter.testing_app.MainActivityTest, methodName: Testing IconButtons, status: PASS}

Device: <<DEVICE ID>>  Zebra TC52: TestResult{className: dev.flutter.testing_app.MainActivityTest, methodName: Testing remove button, status: PASS}

Device: <<DEVICE ID>>  Zebra TC52: TestResult{className: dev.flutter.testing_app.MainActivityTest, methodName: Finding an item in the list, status: PASS}

Device: <<DEVICE ID>>  Zebra TC52: TestResult{className: dev.flutter.testing_app.MainActivityTest, methodName: Verifying whether item gets added to favorites, status: PASS}

Device: <<DEVICE ID>>  Zebra TC52: Uninstalled package dev.flutter.testing_app.test successfully

Device: <<DEVICE ID>>  Zebra TC52: Disabling instrumented test mode

Device: <<DEVICE ID>>  Samsung Galaxy Tab S8 Ultra: Closing device

Device: <<DEVICE ID>>  Google Pixel 4a: TestResult{className: dev.flutter.testing_app.MainActivityTest, methodName: Testing IconButtons, status: PASS}

Device: <<DEVICE ID>>  Google Pixel 4a: TestResult{className: dev.flutter.testing_app.MainActivityTest, methodName: Testing remove button, status: PASS}

Device: <<DEVICE ID>>  Google Pixel 4a: TestResult{className: dev.flutter.testing_app.MainActivityTest, methodName: Finding an item in the list, status: PASS}

Device: <<DEVICE ID>>  Google Pixel 4a: TestResult{className: dev.flutter.testing_app.MainActivityTest, methodName: Verifying whether item gets added to favorites, status: PASS}

Device: <<DEVICE ID>>  Zebra TC52: Ending test execution

Device: <<DEVICE ID>>  Zebra TC52: Stopping video recording

Device: <<DEVICE ID>>  Google Pixel 4a: Trying to uninstall package dev.flutter.testing_app from device

Device: <<DEVICE ID>>  Google Pixel 4a: Uninstalled package dev.flutter.testing_app successfully

Device: <<DEVICE ID>>  Google Pixel 4a: Trying to uninstall package dev.flutter.testing_app.test from device

Device: <<DEVICE ID>>  Google Pixel 4a: Uninstalled package dev.flutter.testing_app.test successfully

Device: <<DEVICE ID>>  Google Pixel 4a: Disabling instrumented test mode

Device: <<DEVICE ID>>  Zebra TC52: Closing device

Device: <<DEVICE ID>>  Google Pixel 4a: Ending test execution

Device: <<DEVICE ID>>  Google Pixel 4a: Stopping video recording

Device: <<DEVICE ID>>  Google Pixel 4a: Closing device
At the end of the execution, the command-line window displays a high-level summary report of the completion status for each device. The report includes:
- Resolution of configuration settings: The configuration file used and the list of the configuration settings for the test run
- Progress notifications as the test is configured, installed, and executed, including notifications of the start and completion of:
- Allocating the device
- Resigning the application
- Installing the application and UI runner files
- Executing the test
- Connecting the video recording
- Completion status for each test method on each device
At the end of the summary report, the plugin provides the URL of the single test report (STR) for the execution run.
----------------------------------------------------------------------------

TOTAL SUMMARY

FAILED TO RUN ON 0 devices
RAN SUCCESSFULLY ON 3 devices
----------------------------------------------------------------------------

DEVICE 1
Status:  ENDED

Device:
<<DEVICE ID>>  Samsung Galaxy Tab S8 Ultra

Results:
4 TOTAL
0 FAILED
4 PASSED
----------------------------------------------------------------------------

DEVICE 2
Status:  ENDED

Device:
<<DEVICE ID>>  Google Pixel 4a

Results:
4 TOTAL
0 FAILED
4 PASSED
----------------------------------------------------------------------------

DEVICE 3
Status:  ENDED

Device:
<<DEVICE ID>>  Zebra TC52

Results:
4 TOTAL
0 FAILED
4 PASSED
----------------------------------------------------------------------------

View the detailed report at:
https://<cloud>.reporting.perfectomobile.com/reporting/library?tags[0]=*******-****-****-****-**********&startExecutionTime[0]=lastMonth

Finished flow execution


BUILD SUCCESSFUL

Total time: 3 mins 59.543 secsTo access the execution report, copy the report URL from the summary report on your console and open the URL in your browser. For example:
View the detailed report at: https://demo.reporting.perfectomobile.com/library?startExecutionTime[1]=lastMonth&tags[0]=5af27a82-54cc-405a-8c6e-fa46fcae874b
Finished flow execution
Every step has a different executionID. As a result, a single test containing 10 steps, for example, will generate 10 Perfecto reports. The device log available for download from the single test report (STR), however, will include information on all steps included in the test application.
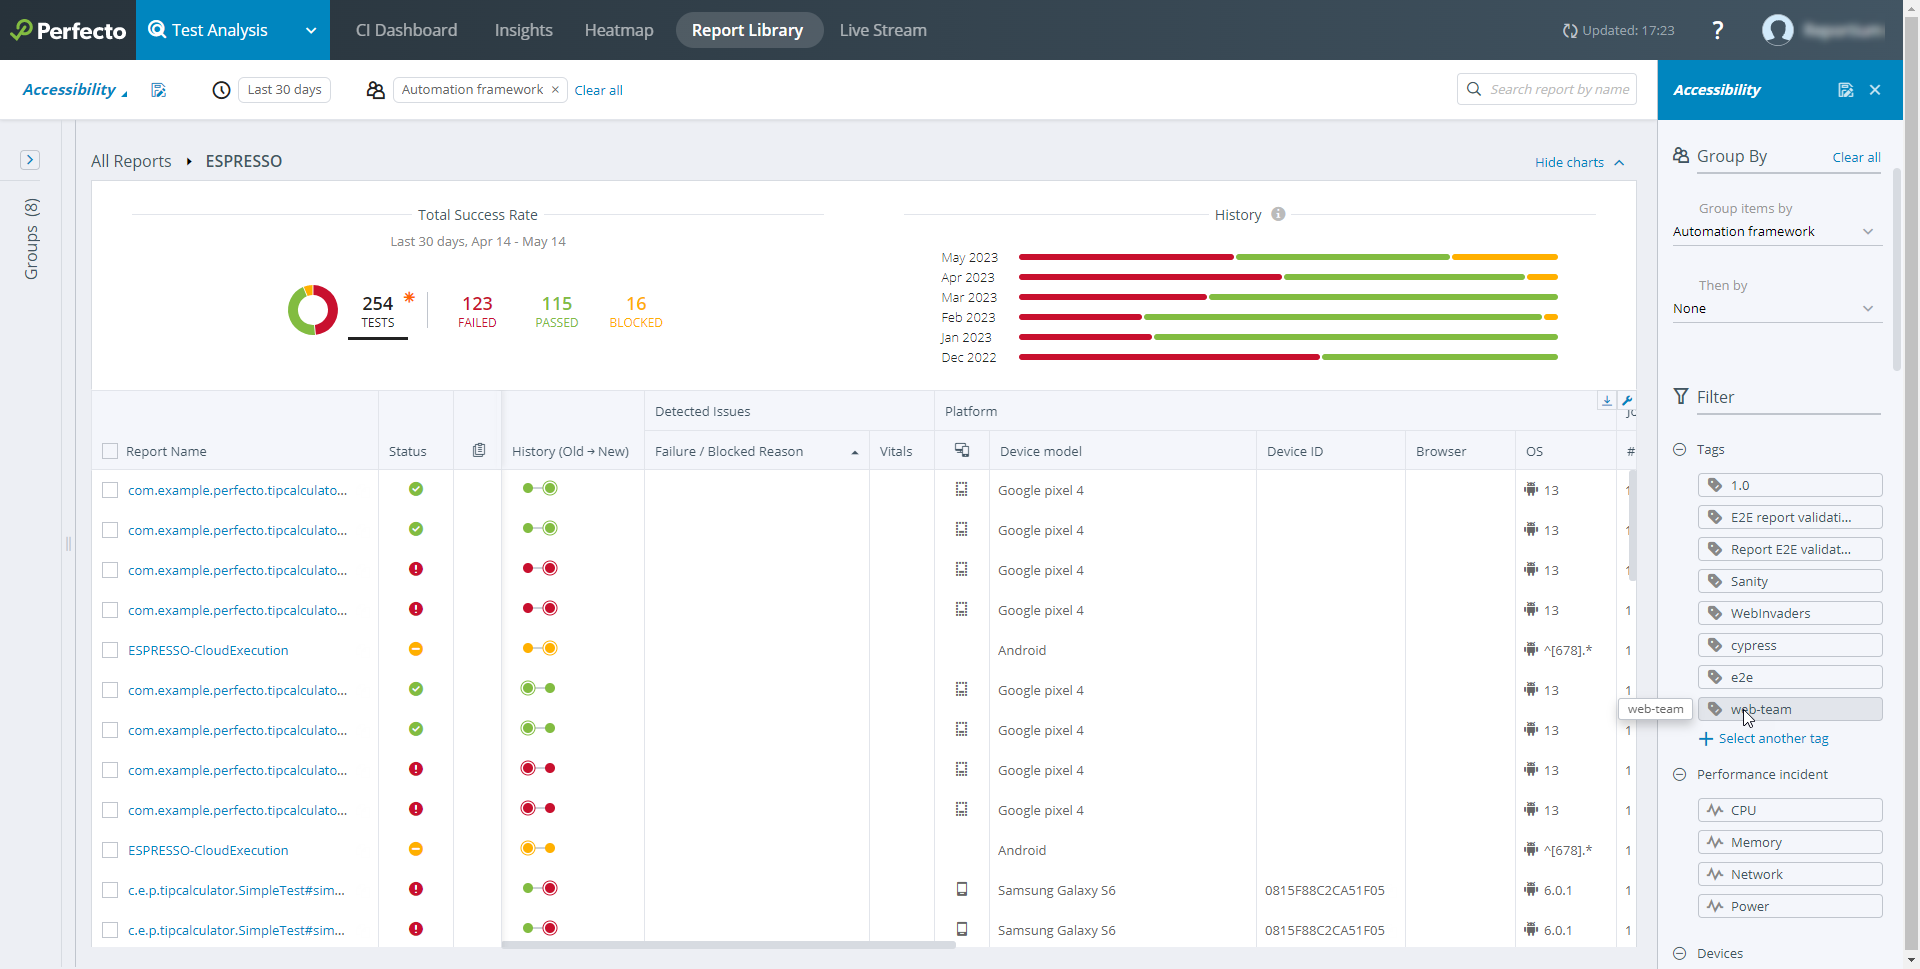
For more information on Smart Reporting, see Test analysis with Smart Reporting. For details on the STR, see Single test report (STR).
Proxy connection
If you run the Gradle plugin over a proxy connection, you can supply the proxy information as follows:
-
As Java parameters when activating the plugin. You can use the same Java Proxy parameters also for proxies supporting SSL encryption.
http.proxyHost: The IP address of the proxy
http.proxyPort: The IP port used for the connection
http.proxyUser: The username for connecting to the proxy server
http.proxyPassword: The password for connecting to the proxy server
For example:
Copy./gradlew perfecto-android-inst -DconfigFileLocation=configFile.json -Dhttp.proxyHost=10.0.0.100 -Dhttp.proxyPort=8800 -Dhttp.proxyUser=someUserName -Dhttp.proxyPassword=somePassword -
As parameters defined explicitly in the
gradle.propertiesfile. For example:CopysystemProp.http.proxyHost=<http-proxy-host>
systemProp.http.proxyPort=<http-proxy-port>
systemProp.https.proxyHost=<https-proxy-host>
systemProp.https.proxyPort=<https-proxy-port>