Object Spy helps you create automated tests by providing information about object locators or identifiers. Object Spy provides a quick snapshot of your native app, hybrid app, or website. With Object Spy, you can explore objects on the device screen and view them in the Object Spy pane to the right of the device. The object tree presents a hierarchical view of all objects retrieved from the webpage or app.
Supported devices
This task is supported on the following devices:
-
Mobile (real)
-
Virtual
Steps
To learn how to work with Object Spy in AI Scriptless, watch this video or review the instructions following the video.
To work with object spy, a device must be ready and the app you want to work with must be open.
To access and navigate Object Spy
-
In the widgets pane, click the Automation button
 .
. -
On the Automation tab, click Object Spy.
-
In the widget, at the top, select any of the following tabs:
-
Object Spy to search for and filter objects.
-
Advanced parameters to configure advanced settings.
-
Object Property to view detailed information about objects.
-
On this page:
Turn Object Spy mode on or off
When you open Object Spy, the Object Spy mode toggle above the open device is turned on by default. To turn off Object Spy mode, click the toggle.

In Object Spy mode, you can select elements on the device screen to find them in the object tree, and vice versa. When an element is selected, a menu appears below the selected element on the device, as shown in the following image. You can use this menu to perform an action on the selected element on the device or to add a command to the test, or both.

When Object Spy mode is turned off, there is no correlation between the object tree and the device. In this case, you can perform actions on the device, such as opening an app or browsing to a URL, just like you would during normal interactive testing without Object Spy.
Configure, filter, or download the object tree
You can simplify the object tree by configuring the maximum number of children included in the tree or by filtering the tree by specific object types: buttons, edit fields, images, links, text, or other objects. By default, all objects are shown in the object tree. However, if you limit the number of children or filter the tree, the object that you select on the device might be hidden in the tree.
Filtering is helpful when the tree is long and complex and you want to focus on specific objects. When a filter is applied, the object tree reverts to a flat view. A hierarchical view is available only when all objects are displayed.
You can also download the entire object tree as an XML file or HTML file (for web views) for offline use.
-
On the Object Spy tab, click the Settings button
 .
. -
In the Settings dialog box, do the following:
-
Select the Set max children checkbox.
-
Specify the maximum number of children.
-
Click Save.
-
-
On the Object Spy tab, click the Filter button
 .
. -
Select the objects you want to view or clear the checkbox for objects you want to hide. By default, all objects are selected.
-
Click Filter.
- On the Object Spy tab, click the Download button
 and select the format (XML or Web view1 (HTML)). The file is downloaded to your browser's download pane.
Search and validate
With Object Spy, you can search an object tree by specifying an object property. If the search brings up results, the number of objects found is displayed next to the search field. You can use the < Prev and Next > buttons to browse through the results.
In addition, you can use Object Spy to validate object locators to make sure they are strong. Strong locators are an important component of reliable tests.
-
To find all objects that contain a specific string, on the Object spy tab, click Search properties.
-
In the Search by object properties field, enter the word or string you want to find.
The search is dynamic. The results are refined as you type, and the number of found objects appears next to the search field.

-
Use the previous
 and next
  buttons to navigate the results. The search results are highlighted.
 -
(Optional) Below the Search by object properties field, hover over the smart locator value and click the Copy to clipboard button
 .
.The Object Property tab displays the object's smart locator, object type, XPath, and other properties and associated automation functions. At the same time, the selected device on the screen is overlaid with a rectangle.
-
In the Object Spy pane, click Validate object.
-
From the list, select Native (selected by default) or Dom (available only for non-native apps).
If Dom is selected, select the validation method: xPath or CSS.
-
In the Validate object locator field, enter a locator.
-
Click the arrow button next to the Validate object locator field.
The validation is successful if the object is located on the screen.
View object properties
To view object properties, you can select an object on the device screen and click Object Property at the top. Many object parameters are displayed, for example:
- Smart locator (formerly referred to as object locator)
- Object type
- Xpath
- X and Y coordinates
- Height and width
- Identifier
- Name
- Label
- Type
- Value
- Resource ID
- Package
- Origin class
- Class
For Boolean properties, the pane provides information on whether they are turned on (indicated by a green checkmark ![]() ) or off (indicated by the general prohibition sign
) or off (indicated by the general prohibition sign ![]() ).
).
You can copy a path or property to the clipboard to embed it in your automated tests.
-
Hover over the parameter value and click the Copy to clipboard button
.
Run and add commands
In Object Spy mode, you can run a command on the selected element on the device, add a command to the test, or both. In the process, you can also configure parameter values as needed.
When you click an object on the device screen, a menu with the following options appears:
|
|
Click element |
|
|
Enter text |
|
|
Find element |
|
|
View element info |
|
|
Run the command on the device |
|
|
Add the command to the test |
|
|
Apply the selection |


-
In Object Spy mode, click an object on the device screen.
-
On the object command menu, click a command.
-
(Optional) In the parameter pane below the object tree, configure parameter information as needed.
To view advanced parameters, above the parameter table, click Advanced parameters.
-
Select the required checkbox next to these options:
-
 Execute the selected action on the device.
 -
 Add the selected action to the test.
-
-
To confirm your selections, on the object command menu, select the Apply checkbox
 or at the bottom of the form, click Apply.
Object Spy for multiple devices
You can use Object spy for all open devices simultaneously. Object Spy stays disabled until the devices you opened are ready.
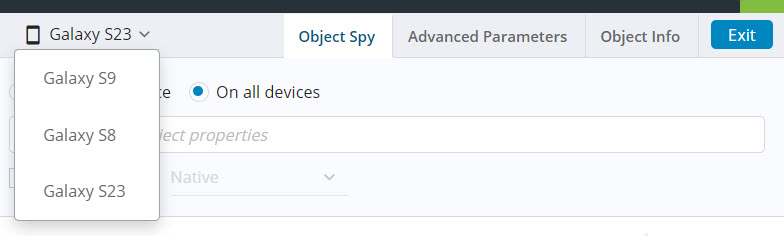
In the Object Spy widget, there are two modes of performing an operation as needed: You can select to work on a single device or multiple devices. Select the On current device or On all devices mode as needed.
You can also select a specific device from all open devices and work with it. In the Object Spy widget, at the top, you can select a device from the list of open devices.
To learn how to work with Object Spy on multiple devices, watch this video or review the instructions following the video.
-
To find all objects that contain a specific string on all open devices, select On all devices.
-
In the Search by object properties field, enter the word or string you want to find.
The search is dynamic. The results are refined as you type, and the number of found objects appears below the search field.

-
Click the previous
 and next buttons
  to switch between devices. Use the previous and next buttons to navigate the results. The search results are highlighted.
 -
(Optional) Below the Search by object properties field, hover over the smart locator value and click the Copy to clipboard button
.The Object Property tab displays the object's smart locator, object type, XPath, and other properties and associated automation functions. At the same time, the selected device on the screen is overlaid with a rectangle.
-
To validate object locators on all open devices, select On all devices.
-
Below the Search by object properties field, select the Validate object checkbox.
-
From the list, select Native (selected by default) or Dom (available only for non-native apps).
If Dom is selected, select the validation method: xPath or CSS.
-
In the Validate object locator field, enter a locator. When you search for a valid XPath, the result shows objects found on all devices.

-
Click the previous
and next buttons to switch between devices. Use the previous and next buttons to navigate the results.