JUnit is a unit testing framework for the Java programming language. JUnit has been important in the development of test-driven development and is part of the family of unit testing frameworks that is collectively known as xUnit that originated with SUnit.
On this page:
Pros of JUnit
- JUnit ensures that every single bit of the software is tested even before module or system-level testing is performed.
- JUnit lets you easily create and manage a rich unit test case suite for the entire software.
- Junit has become a standard for testing in the Java programming language and is supported by almost all IDEs, such as Netbeans, Eclipse, and so on.
- Any new member of the team can easily understand the test cases written and managed in JUnit and consequently contribute toward writing more test cases for developing robust software.
- JUnit integrates with Ant to allow executing test suites as a part of the build process, capturing their output, and generating rich color enhanced reports.
Challenges of unit testing
- Unit testing is no guarantee for quality.
- Unit testing can be cumbersome. Sometimes, you may find yourself spening more time on finding a test than on solving the problem.
- Unit testing only helps with bugs you have anticipated or found.
- Value and accuracy of unit tests can be diminished if initial conditions are not set correctly.
- Integration errors or system errors can be missed.
Step-by-step instructions
Click a step below to view details.
- Download the JUnit jar file (4.11) and add it to your Perfecto Selenium/Appium Project.
-
To add the JUnit framework, right-click your project source folder and select New > Other > JUnit Test Case.
A wizard opens.
-
In the New panel, click Next.
- In the test suite, specify the Java class to be run.
-
In the JUnit Test Case panel, set the following:
-
The source folder of your project
-
The package name (for example junit)
-
The class name according to your requirement
-
- Click Finish.
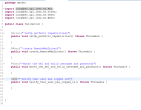
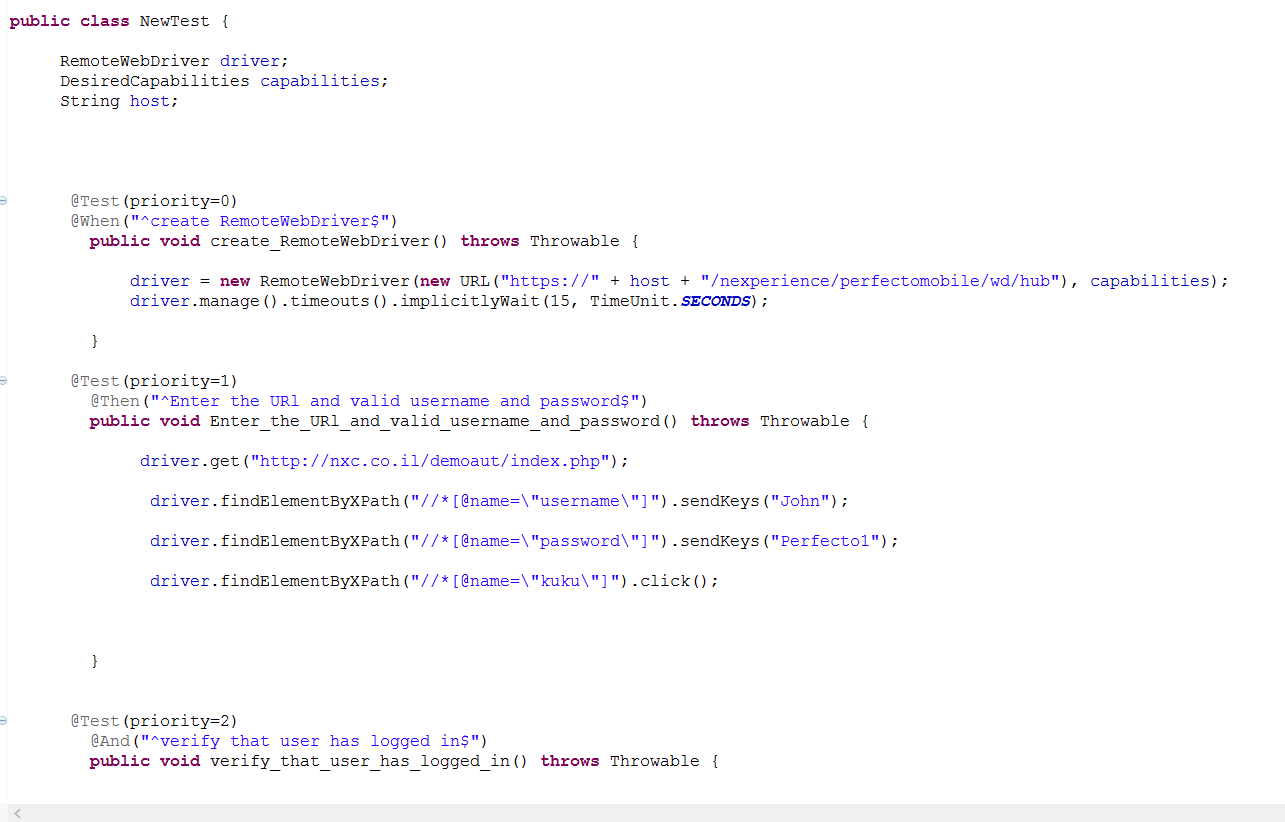
In the new JUnit class, add a RemoteWebDriver class member, as shown in the following image.
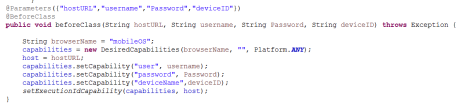
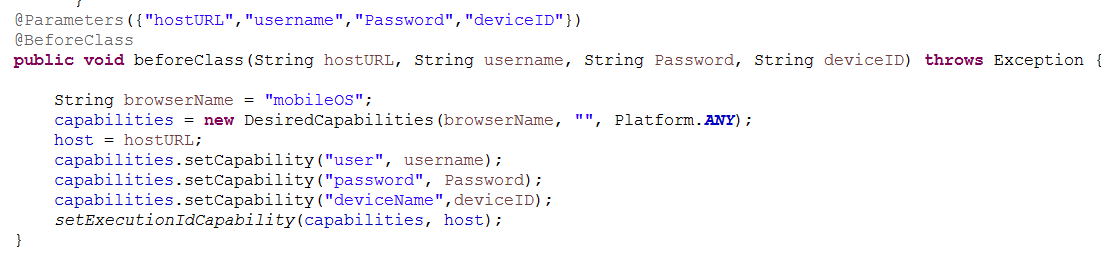
In the beforeclass() method, which is annotated by the @BeforeClass annotation, we set the relevant MCM, credentials, and Perfecto Smart Reporting client (Reportium). Then we add the needed capabilities to choose the correct device.
In the afterclass() method, which is annotated by the @AfterClass annotation, we download the execution report. Then we perform the cleanup by adding the call to driver.quit().
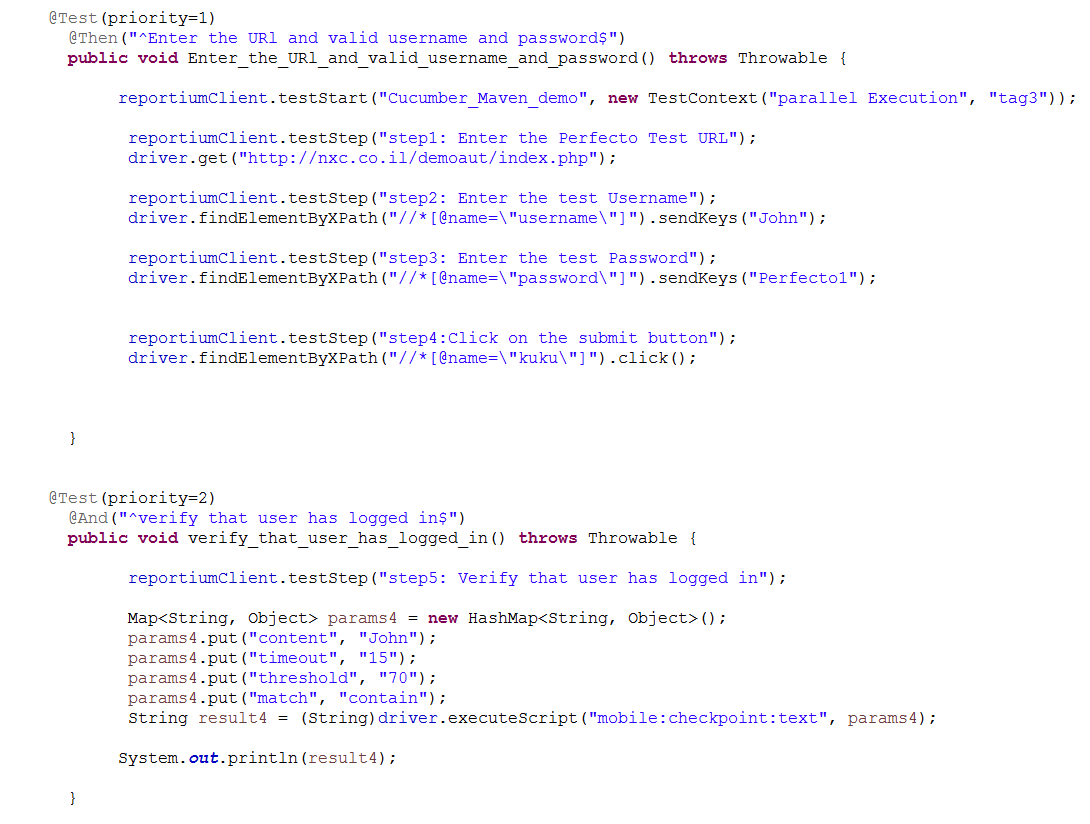
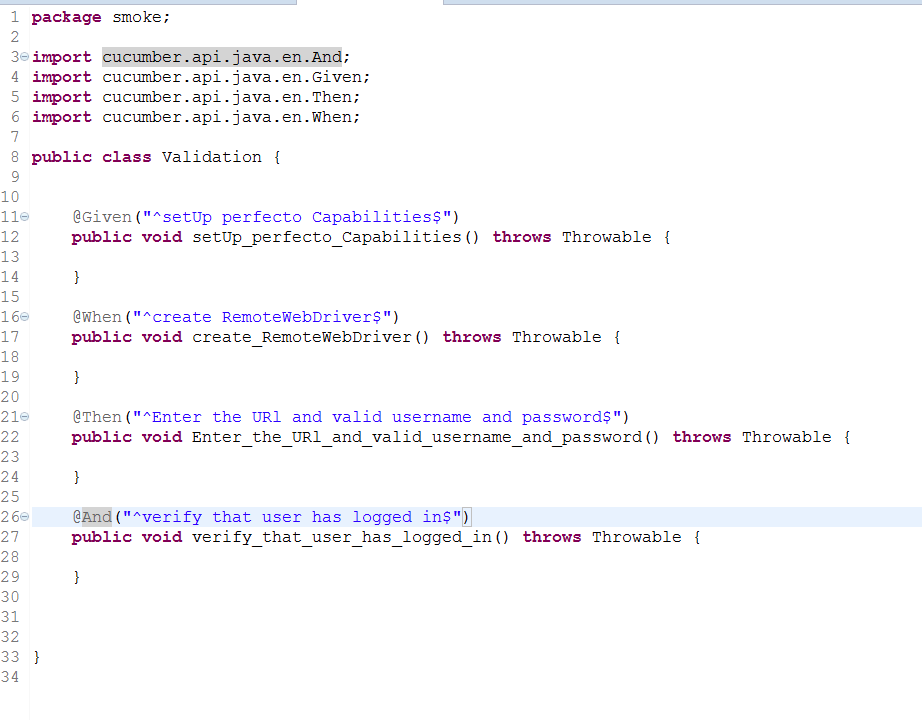
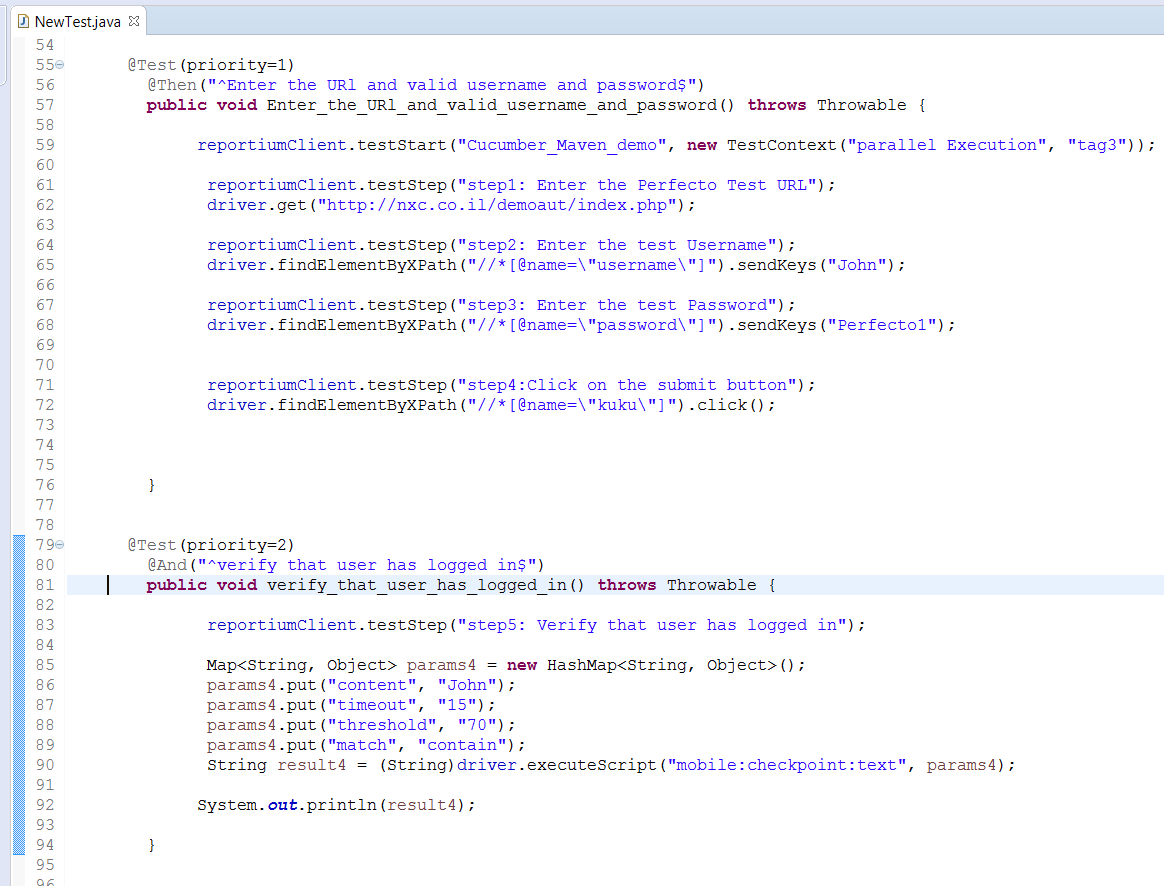
In the test method, which is annotated by the @Test annotation, we include the actual test we want to run.
In this example, the test method includes a script that:
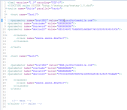
- Launches the device browser and goes to the Perfecto test website.
- Tries to log in using a valid username and password.
- Looks for the “Welcome back” message that is displayed upon successful login.
This is the full basic flow, which creates a RemoteWebDriver, runs the test, and eventually closes the driver and downloads the report.
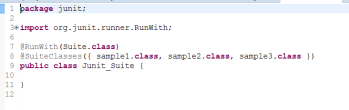
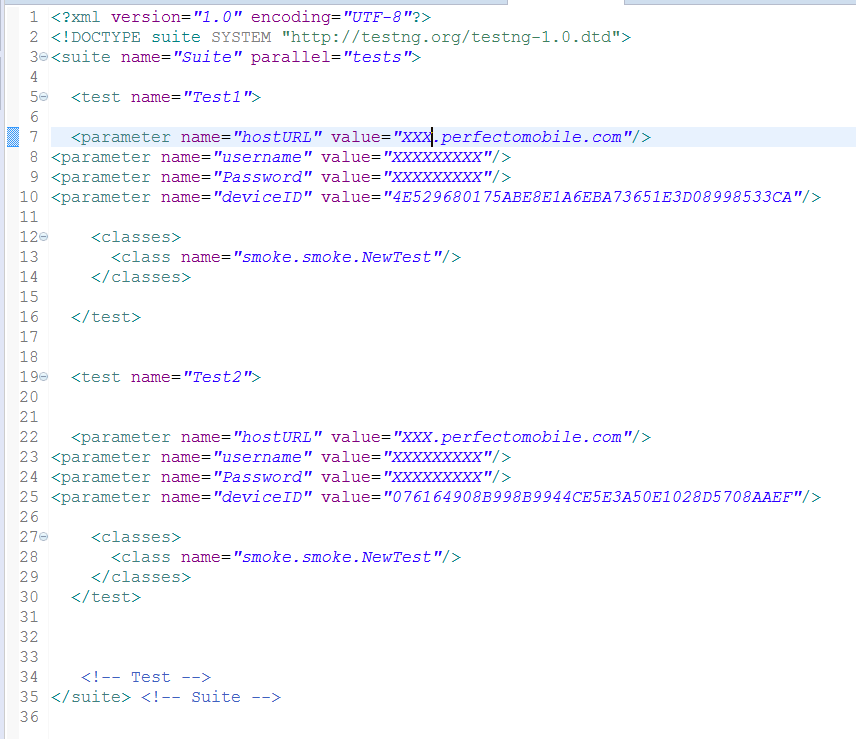
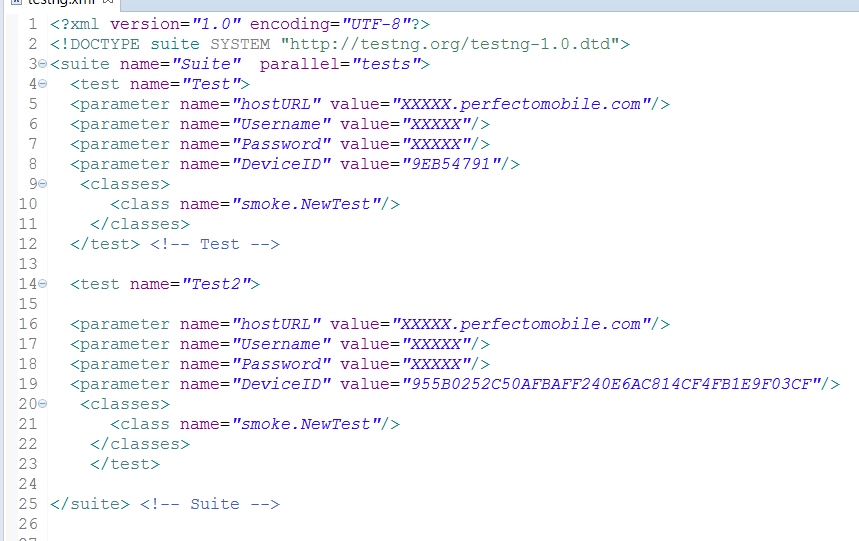
To run the test, we need to have a test runner class for which we create a test suite in which we specify the test class to be run, as shown below.
To create a test suite:
- In JUnit, select to create a new test suite.
A wizard opens. -
In the New panel, click Next.
-
In the JUnit Test Suite panel, specify the Java class to be run and click Finish.
A test suite is created by specifying the class to be run.
-
Run the testRunner as JUnit.
-
When the test run is complete, view the result in the JUnit perspective.
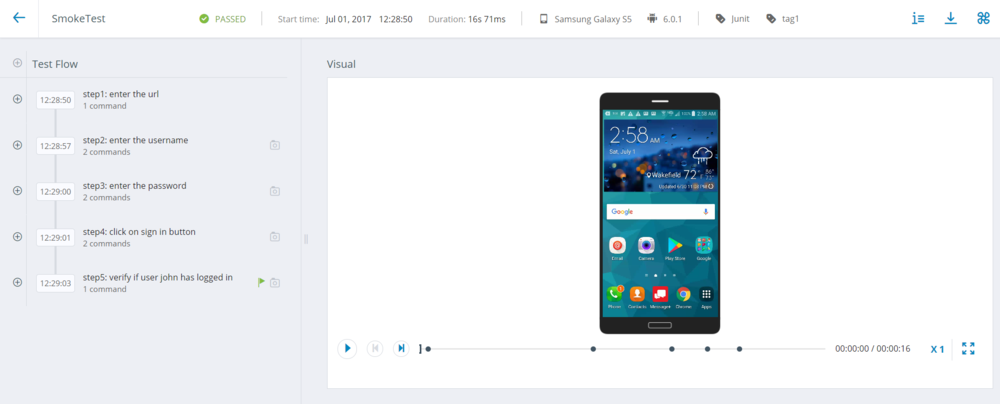
- Download the report: Log into your Perfecto cloud and click Test Analysis.
-
In the Report Library, select the test and check the execution step by step, along with screenshots and an entire execution video.
To create a test suite with JUnit framework:
- On the project source package, click New, select JUnit Test Suite, and click Next.
-
In the JUnite Test Suite panel, do the following:
-
Give the test a suite name, for example Junit_Suite.
-
Sett the package to Junit. By default, this includes all test cases created in the package. You can also select the classes you want to run.
-
Click Finish.
A JUnit test suite is created in the package.
-
-
Open the JUnit suite to see the classes selected to run.