On this page:
Touch and key press
When the screen is clicked, touch visibility is displayed.
The following video demonstrates key press and touch.
To press any button or physical keys on the device - click it.
To tap or touch the screen - click it.
Certain actions on the device require a long touch or key press. To perform a long touch or key press, hold the CTRL key (CMD key on Mac workstation) and click on the device.
A green arrow will appear at the top of the device.

Key press and Touch example: Green arrow appears in the upper left corner
Scroll and swipe
Most real device operations can be performed as if you were performing them on the actual device.
- To scroll - Click and move your mouse in the desired direction. (For a more controlled scroll, do SHIFT and then scroll in the desired direction.)
-
To swipe - Hold the SHIFT key and drag the mouse on the device screen in the desired direction. The movement gesture is marked with a green line.
The following video demonstrates scroll and swipe:
To drag - Click on an icon, move your mouse slightly until the item is responsive, and then drag.
The following video demonstrates drag:
Pinch & zoom in Interactive mode
Pinch & zoom are available in Interactive mode in addition to the previous automated operation support, using Ctrl-Shift-drag-up/down for zoom-in/out, respectively.
The following video demonstrates Pinch & zoom.
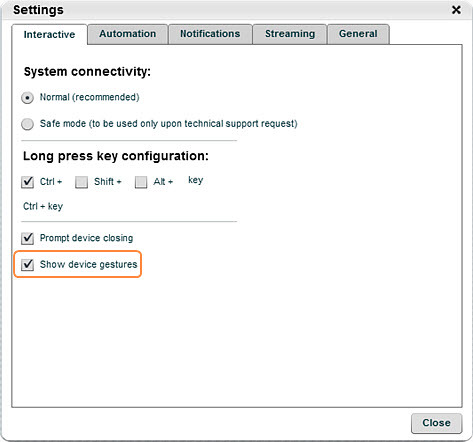
Device gestures
Screen Gestures such as click and scroll can be made visible. There is a visual display of the exact gesture performed on the device.
How to Use:
Enable the show device gestures settings preference from the More menu, located at the top right corner of the IDE.
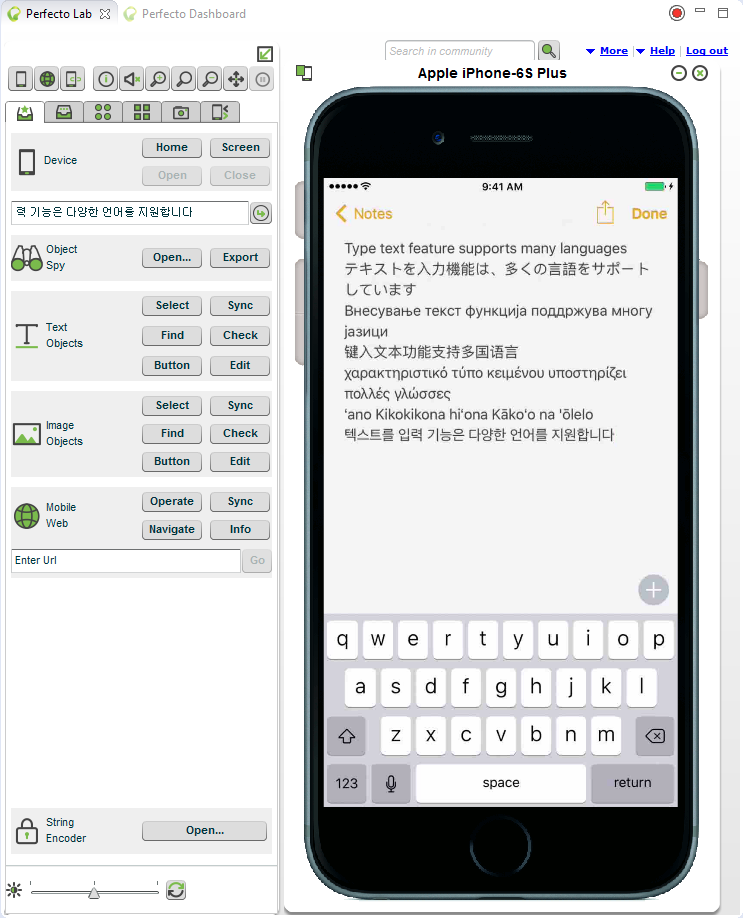
Text entry
The text entry feature allows you to input text, in any language, into the device.
To input text the device should be in text-entry mode. Either the virtual keyboard is open or the cursor is waiting for text.
In some devices, typing the text on the dialing screen might not be supported. For these devices, the keyboard can be used
To input text:
- Select a location on the device to enter text.
- On the side panel, type text in the text box.
-
Click the blue arrow.
Navigate to websites
- The open URL widget opens a browser and navigates to the URL provided.
- The default browser is the one set by the device Operating System.
- The default browser will open Chrome for Android, Safari for iOS.
- This is the recommended option.
Device icons
Left pane icons and Contrast Control
|
Icon |
Description |
|---|---|
|
|
Show/hide the device pane (or dashboard) |
|
|
Reserve the device immediately or schedule a reservation |
|
|
Settings for the device: touch and trackball |
|
|
Show additional device information |
|
|
Mute/Unmute audio enabled devices. By default, all devices are muted when opened. Unmuting the device may cause increased latency. |
|
|
Zoom in/out of the device and Zoom options |
|
|
Device orientation (landscape/portrait):
|
|
|
Copy direct link to the device to the OS clipboard (used as bookmark or to include in email message). |
|
|
Freeze/Release the device screen. Digital snapshot into the device screen. |


Network virtualization
The Perfecto Mobile network virtualization mechanism examines the impact of different network conditions.
Use the Network widget to change the network conditions on the device and get critical insights to end-user experiences.
Considerations
Special considerations regarding network virtualization:
- Use of widget requires performance license.
- The device needs to be on Wi-Fi in order to apply these network conditions.
- An extended version of this command is available in Perfecto Automation, under Services -> Network Virtualization
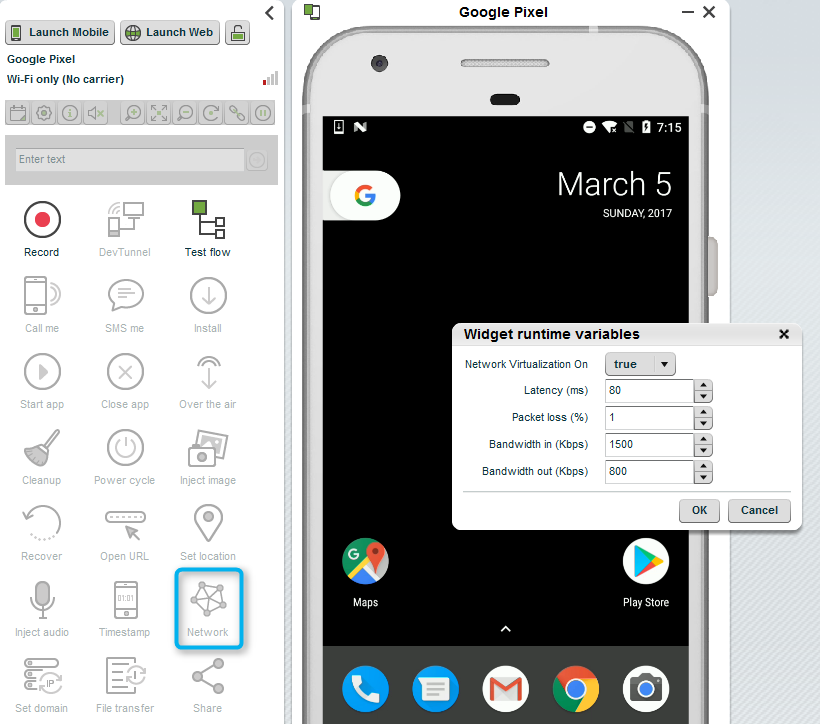
Runtime variable values
- Latency values are in the range of 0-8000 ms.
- Packet loss values are in the range of 0-100%. A reasonable packet loss value should not exceed 5%.
- Bandwidth in/out values are in the range of 3-100,000 Kbps, or unlimited.
For more information on the variables see the Network Virtualization REST API.
Set and reset device location
Set device location allows developers to test applications that use location services on Android & iOS devices.
Reset location allows developers to stop setting the device location, and return the device to its current location, on Android devices only.
To set the device location:
- Click the Set location widget.
- Insert the location address (using Google Geocoding format) or coordinates (Latitude,Longitude format) and click OK.
Example address: 1600 Amphitheatre Parkway, Mountain View, CA
Example Lat,Long coordinates: 43.642659,-79.387050
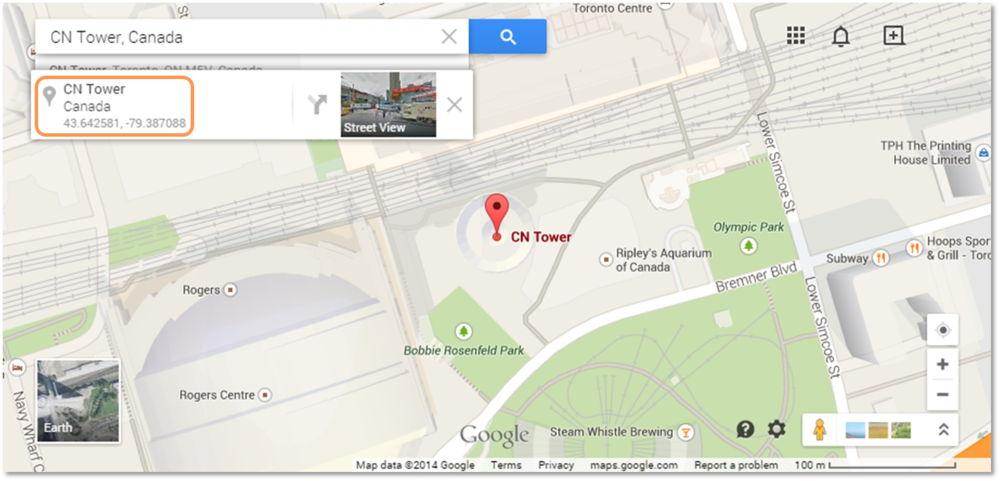
Obtain location coordinates
Use Google Maps to easily retrieve the coordinates of a place.
Troubleshooting
If Set device location does not work:
- Confirm that the Reset Location parameter is set to false
- Open, close, and reopen the application in which the location is set.
- Use the location coordinates instead of the location address.
-
To find the coordinates of a place on Google Maps, follow these steps:
-
Open Google Maps on a web browser (make sure not to use Lite mode).
-
Right-click the place or area on the map.
- Select What's here?
-
A pop-up appears at the bottom of the screen with the coordinates info
(for example: 42.520451, -71.084726).
-
If you are able to set the location with the coordinates but not with the location address, please open a Support Ticket.
Android troubleshooting
Confirm the following settings.
- "Allow mock locations"
Go to: Settings > Developer options > Allow mock locations
- "Device Only" or "Device Sensors Only"
Go to: Setting > Location > Mode > Device Only / Device Sensor Only
To reset the device location:
-
Click the Set location widget.
-
Set Reset Location to true and click OK.

Reboot and recover a device
Use the power cycle and recover widgets to solve issues of black screen and frozen videos
Reboot a device
Reboot a device by clicking on the Power cycle widget. Use this widget if the device freezes or for a fresh start.
While the device is in the reboot process, you cannot perform operations. If you attempt an operation, an error message may appear.
Recover a device
Recover a device that is unresponsive (e.g. interrupted video, black screen or touch failure) with the Recover Device widget.

For devices continuously in error state contact your Perfecto Lab system administrator for support.
Drag icons
Emulate dragging icons in interactive mode, to modify their location on device screen.
Applicable for all (Android and iOS) touch based devices except iOS7+.
To emulate dragging icons to a new location while in interactive mode:
- Press the mouse key on the icon.
- While mouse key is pressed, drag the item minimally, just until it starts moving.
- Drag the icon to the desired location, and release the mouse key.
Clear background apps
Perfecto supports, in Interactive mode, displaying the list of running apps, by double-clicking the Device-Home button, and stopping the apps by swiping the app window up..
*Applicable for iOS 9 and up
Do not remove the Perfecto application, or your device will disconnect.
The following video demonstrates working with the running apps.
File Transfer
Moving files to and from the device.
To upload files to a device:
- Click on the File transfer widget.
- Select file(s) to upload. For multiple files use Ctrl select.
- Select a destination folder
- Click the upload arrow to start the upload.
To download files from a device:
- Click the File Transfer widget.
- From the Device or Card tabs select file(s) to download.
- Click the blue download arrow.
- Confirm the Download location.
- Click OK.
Most devices allow copying files to specific locations:
- Android - to the memory card
- iOS - to either Media folder or the app's document folder (provided the app allows it). Read here on locations and the UIFileSharingEnabled key.
Device cleanup
Remove all applications installed on the device during a session. The cleanup behaves differently on public and dedicated clouds.
Cleanup in public cloud
As the devices are shared, the cleanup is performed automatically when a device is closed for security purposes.
However, public cloud users should always clean a device and remove any personal data before returning the device to the device pool. This includes, but is not limited to, email accounts, browser cookies/open tabs, and any manually configured WiFi VPN settings.
Cleanup in dedicated clouds
Cleanup is not performed automatically, when a device is closed a popup appears that prompts the user to perform cleanup.
Keep the Application Installed During the Clean up Process - Baseline Application for Dedicated Clouds
On dedicated clouds it is possible to "baseline" an application on a device so it will not be removed when the device is cleaned.
Only a Cloud Administrator can baseline the device.
To baseline an application on a device:
- Select a device
- Install the app(s) that you want to set as baseline.
- Close the device and go to the Sys Admin dashboard > Cradles tab.
- In the list, highlight the device that you installed the apps on.
- Click Baseline.
- The user who is setting the baseline will appear in "allocated" column for a brief time. Once it disappears, the baseline is completed.
- If you wish to remove the application baseline from the device, manually remove the application.
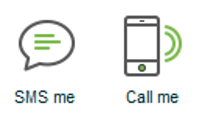
Cloud services
Cloud Services allow you to see how a device responds to runtime events such as an incoming call or SMS message. The Call Me and SMS Me widgets provide a simulation of everyday situations while an application is running.
To Call or SMS a device:
Click on the Call/SMS me widgets
Allow the system and the device processing time to complete any request.
Inject audio
Steps to use audio injection on a device.
The Inject Audio widget plays an audio file into the device audio-in.
The quality of sound (sample rate) needs to be 16000 Hz or above.
To inject audio:
- Click the Inject Audio widget.
- Select the file to inject - local or in the repository.
- Click Run to start audio injection.
-
A message appears when the inject audio is completed.
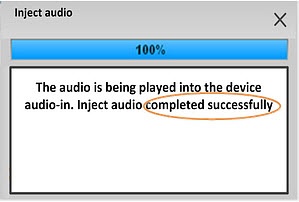
File formats supported are MP3 and WAV. Maximum file run time of 4 minutes.
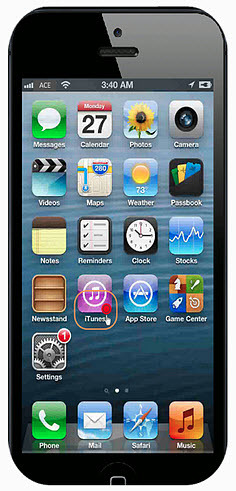
Manipulate iOS applications
Working with applications installed on actual devices means that you adhere to the operations defined for the actual device and the applications. Devices running iOS allow you to manipulate the applications by performing a "long press" on the home page of the device. After the long press, the application icons begin to wiggle and a small 'x' appears in the upper-right corner of the installed application icons.
Manual long press
Perform a long press by holding down the CTRL key (CMD key on a Mac workstation) and the mouse button for approximately 6 seconds.
Manual uninstall
Some iOS applications cannot be uninstalled programmatically from a device and the Perfecto tools (for example, the mobile:applications:uninstall command) may be unsuccessful in uninstalling the application. To uninstall the application, perform a "long press" on the device. A small "x" will appear on applications that may be uninstalled (see top figure). Click the "x" and confirm the delete action.
Group applications into folders
While the application icons are wiggling you can move the icons and create folders to group applications together.
- To create a folder: drag an application onto a second application that you want to group together. iOS will create a new folder that you can rename.
- To add an application to a folder: drag the application into the folder.
- To remove an application from a folder: drag the application from inside the folder to the are outside the top of the folder area.