Under Assets & Setup > Reservations, you can reserve one or more devices for immediate or future use to ensure they are available when you need them. The Reservations view presents a clearly structured calendar with options to view reservation details and device details and to add descriptions, make changes, or delete reservations. Adding a reservation is a quick, 2-step process where you select your device or devices from a filterable list and then select the reservation time. You have full visibility into the schedule of each device.
By default, Perfecto retains reservations for 90 days. To keep reservations for a different range of days, contact Perfecto Support.
Administrators are able to see all reservations at a glance, including the user who made a reservation, and also filter by users. They can create, change, and delete reservations for all users.
Watch this short video to see how you can manage reservations. Detailed steps follow.
Click a task to view its steps.
-
On the Perfecto landing page, under Assets and Setup, click ACCOUNT SETUP.
-
In the Assets and Setup view, click Reservations.
- Click Add Reservation.
-
In the 1 DEVICE SELECTION panel:
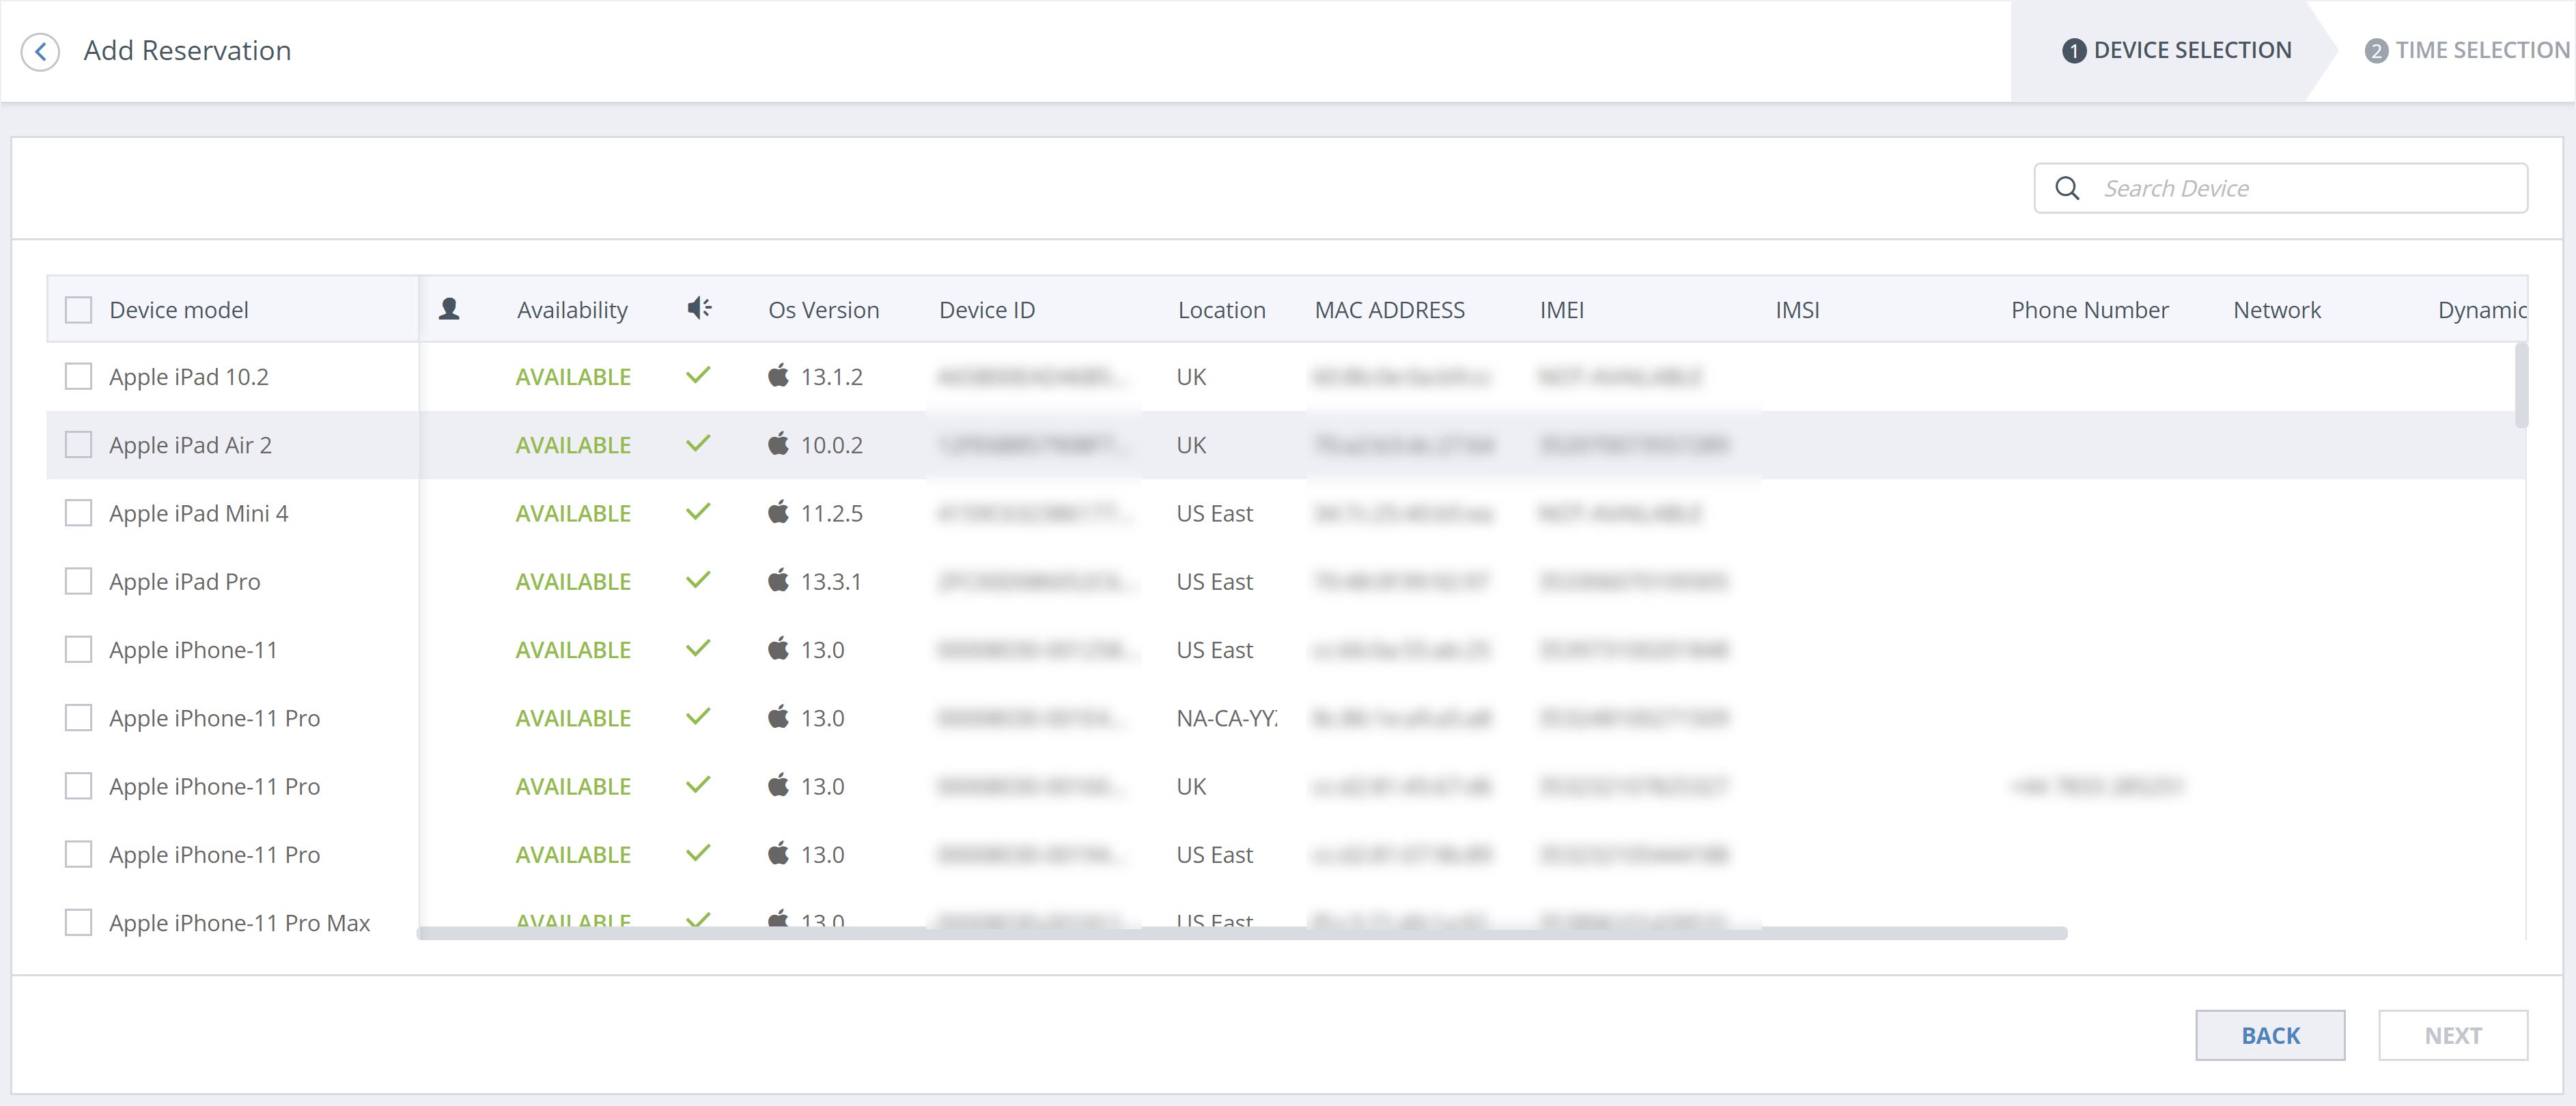
- Select one or more devices. You can also use the search field at the top to find a specific device or add a filter to minimize the number of devices shown.
- Click NEXT.
-
In the 2 TIME SELECTION panel:
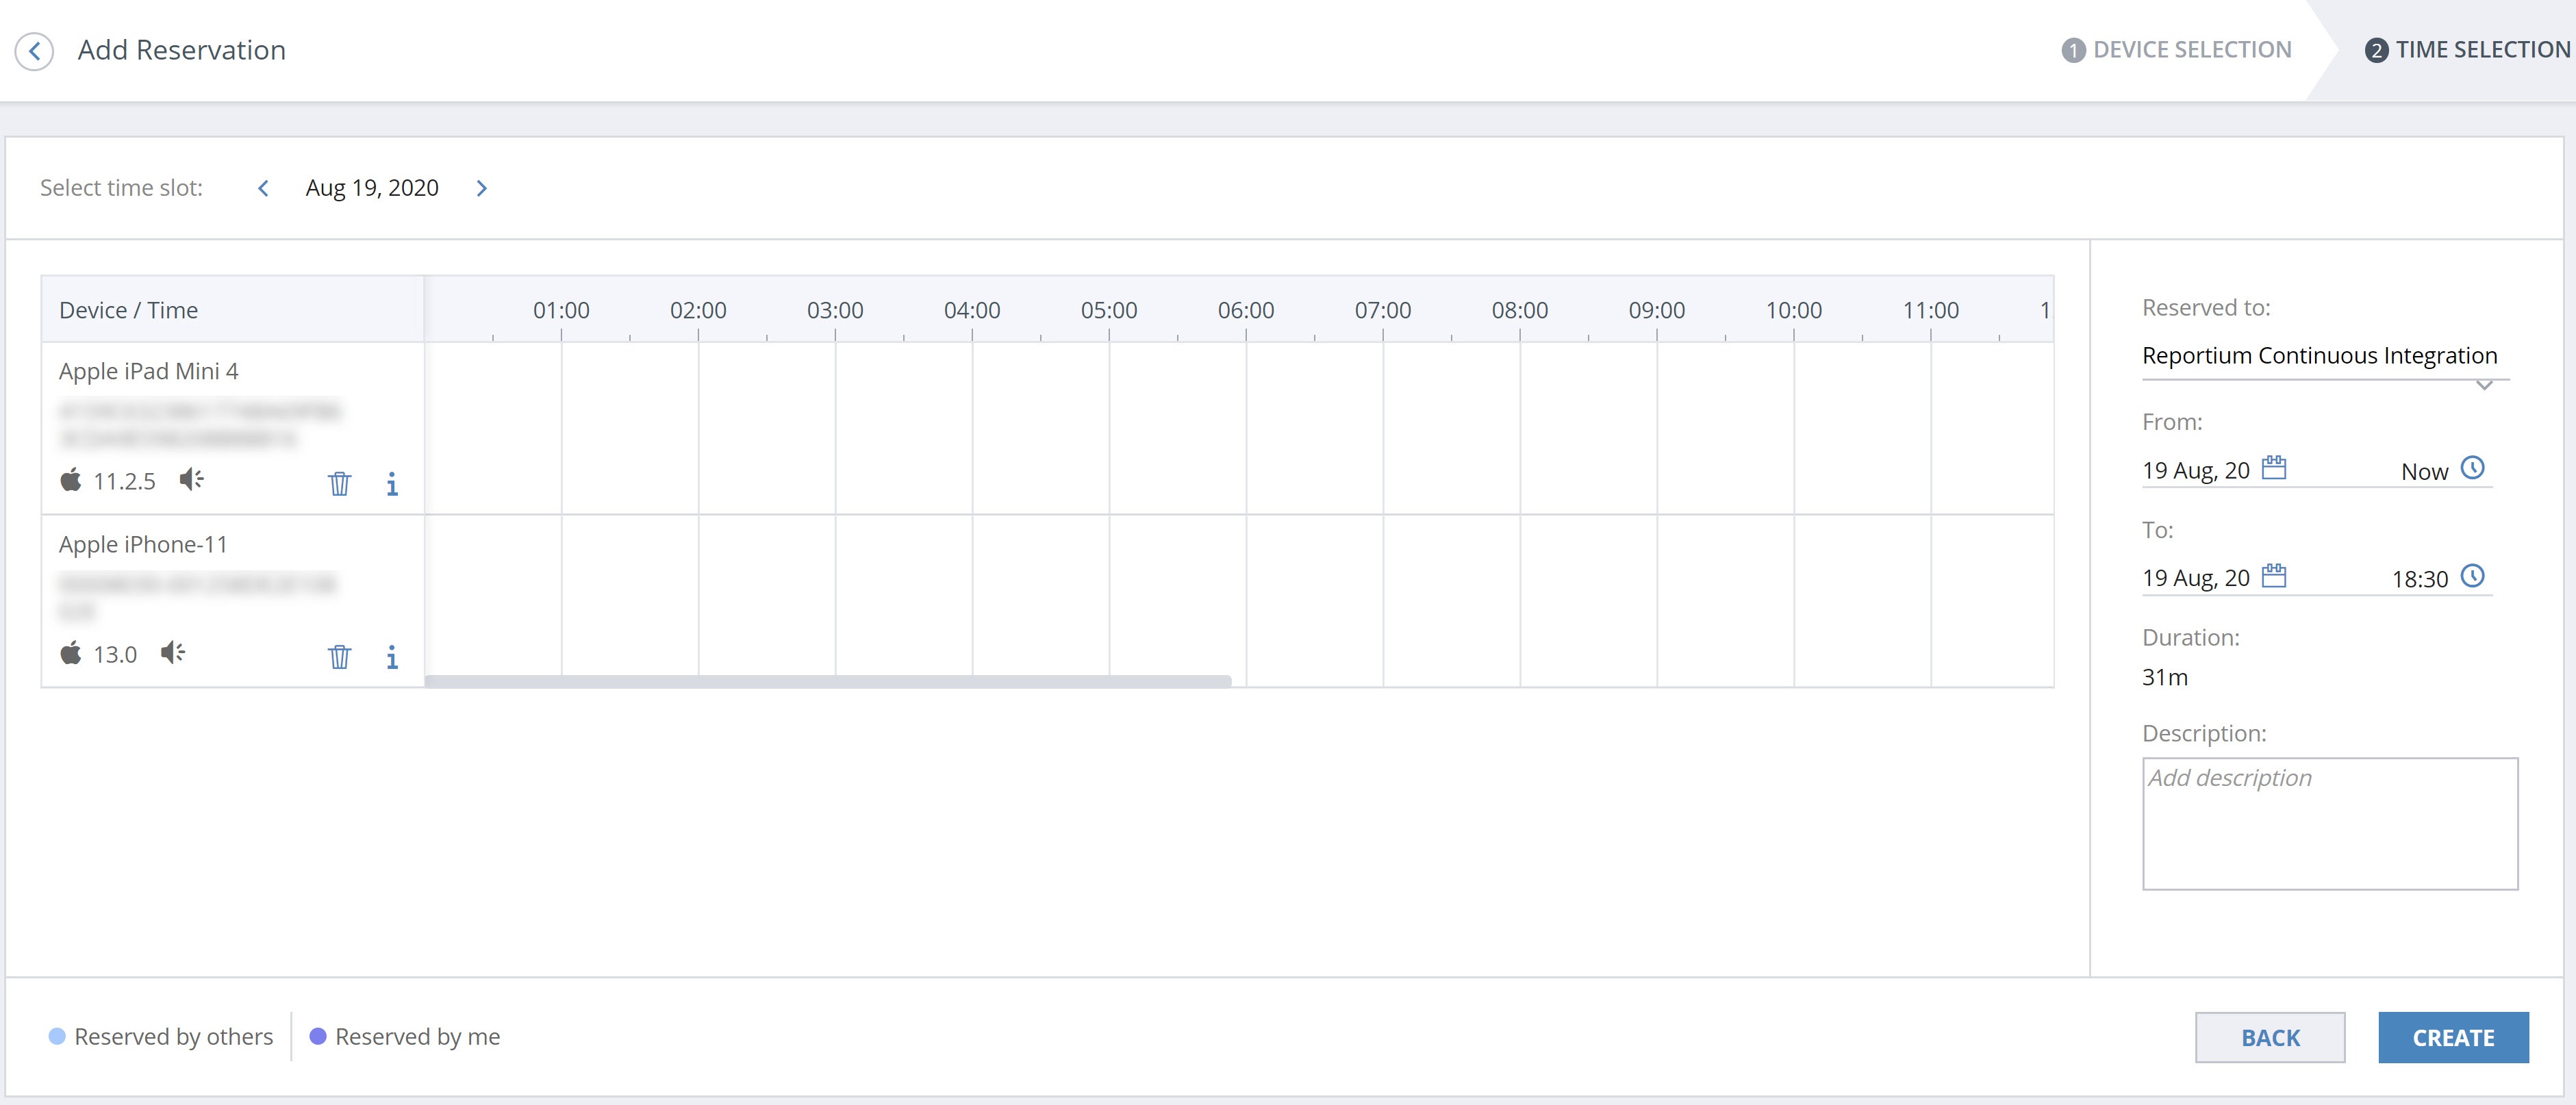
- Select a time slot for each device.
- Click CREATE.
-
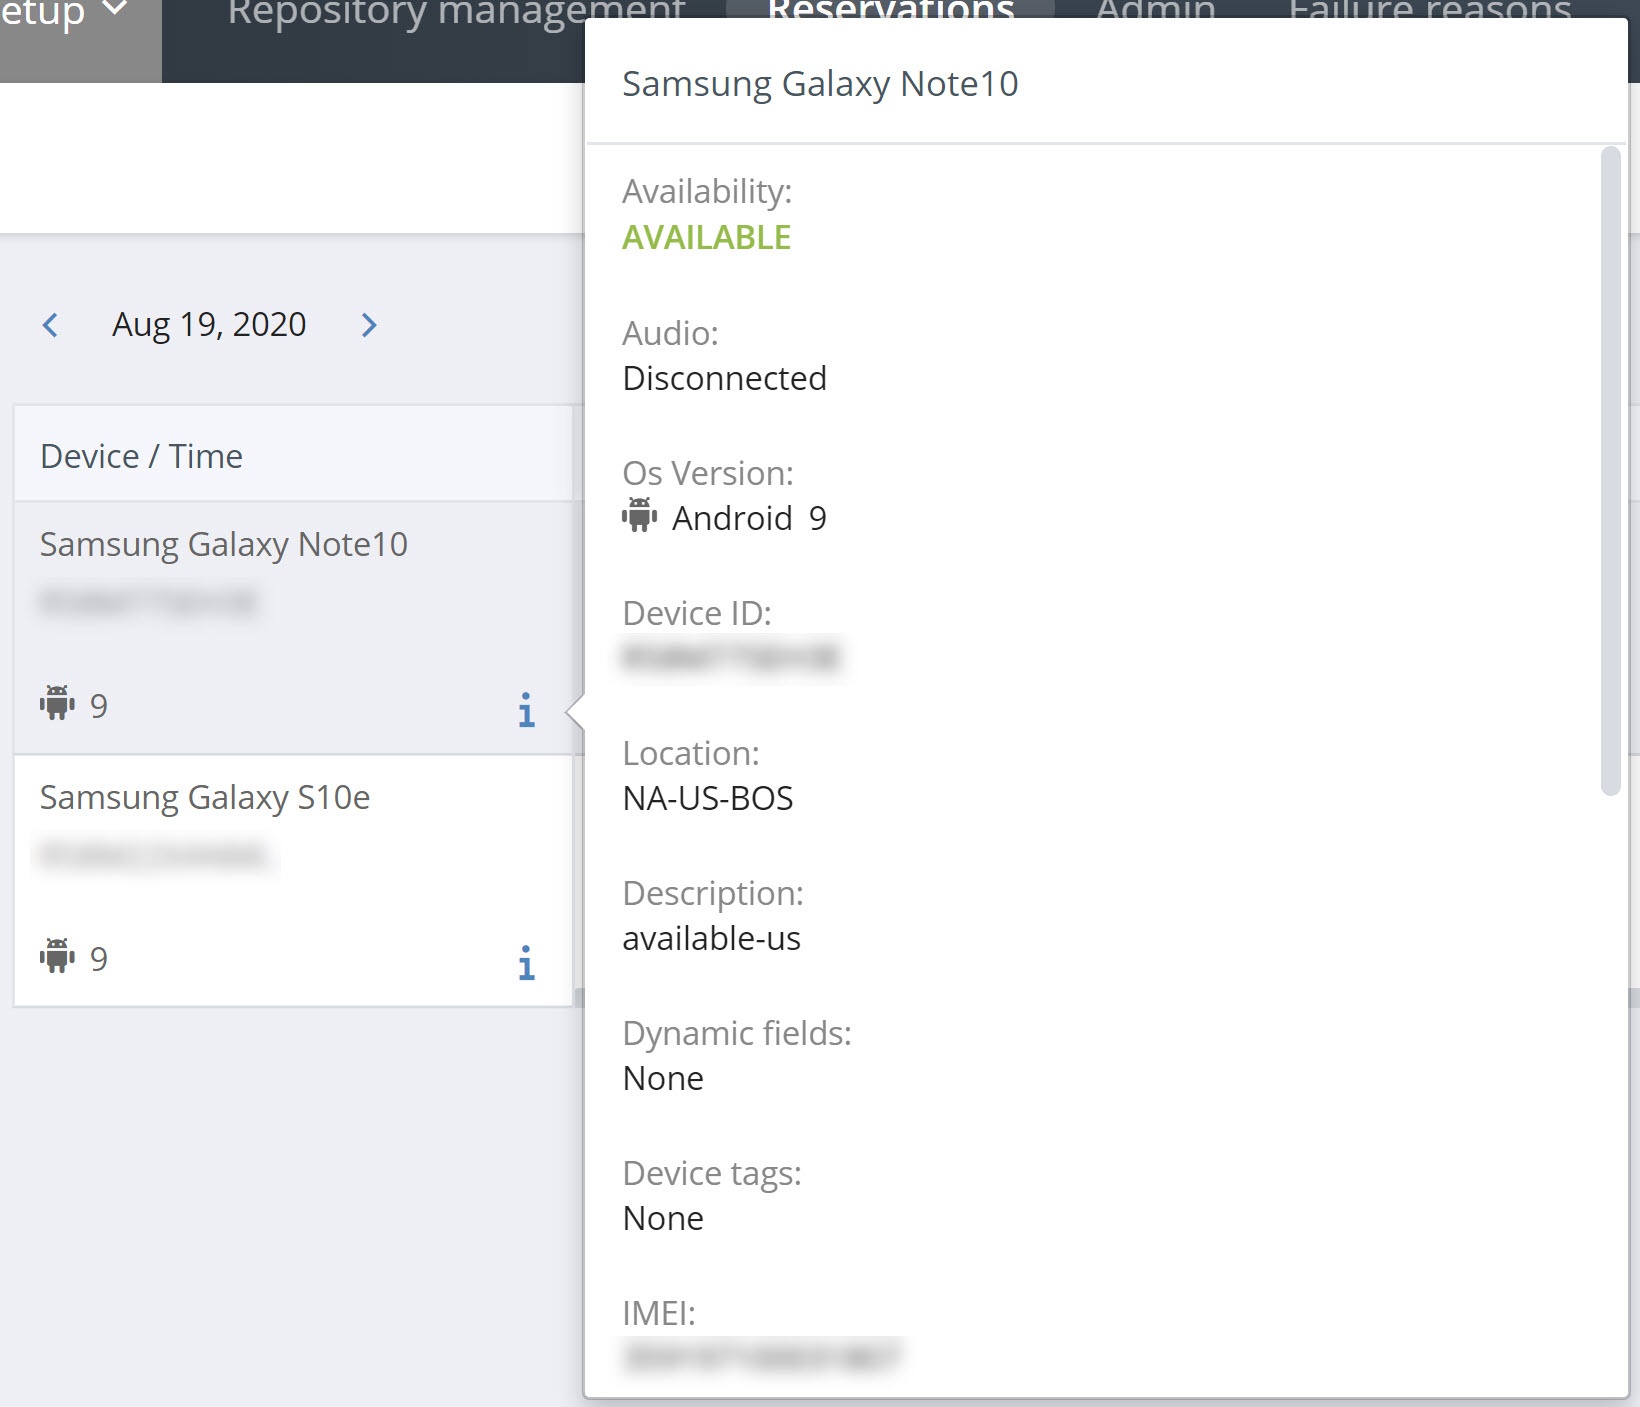
In the calendar, in the Device/Time column, click the information icon for the device.
- In the calendar, in the Device/Time column, click the reservation you want to delete.
- In the Reservation panel on the right, click DELETE.
- When prompted for confirmation, click YES.
-
In the filter at the bottom left, select the checkbox next to users whose reservations you want to display. You can also use the search field to find a specific user.
The calendar updates to only show reservations for the specified users.
- In the calendar, in the Device/Time column, click the reservation you want to modify or delete.
- In the Reservation panel on the right, if you modify a reservation, make the required changes.
- Click SAVE or DELETE, as needed.
- If deleting a reservation, when prompted for confirmation, click YES.
- Click Add Reservation.
-
In the 1 DEVICE SELECTION panel:
- Select one or more devices. You can also use the search field at the top to find a specific device or add a filter to minimize the number of devices shown.
- Click NEXT.
-
In the 2 TIME SELECTION panel:
- Select the user for which you want to create the reservation.
- Select a time slot.
- Click CREATE.