Perform the following steps to set up and connect Android devices to your hybrid cloud. These steps may vary slightly between device model, manufacturer, carrier, and OS version. This example uses a Samsung device.
To be able to connect devices in Perfecto, you need a user with lab admin privileges. To learn more, see Device management.
Set up an Android device
Perform the following tasks to set up an Android device. This example uses a Samsung device.
-
Turn on the device.
-
On the Welcome screen, tap Start.
-
On the legal items screen, select I have read and agree to all of the above.
-
Click Next.
-
On the Choose a Wi-Fi network screen, tap the appropriate Wi-Fi network.
-
On the selected network screen, do the following:
-
Enter the appropriate network credentials and tap Advanced.
-
Tap MAC address type and select Phone MAC.
-
Tap Connect.
-
-
Back on the Choose a Wi-Fi network screen, tap Next. The device will load for a moment.
-
On the Copy apps & data screen, tap Don't copy. The device will load for a moment.
-
On the Google Sign in screen, tap Skip.
Do not sign in with a Google account during initial device setup. Signing in at this stage can prevent the device from connecting correctly to the Perfecto cloud. -
When prompted, tap Skip again to confirm.
You can add your Google account after the device is connected and visible in Perfecto.
-
On the Google Services screen, tap More.
-
On the Device maintenance screen, tap Accept.
-
On the Protect your phone screen, tap Skip. Then confirm by tapping Skip again.
-
On the Samsung account screen, click Skip.
-
On the You're all set up! screen, click Finish.
-
On the device home screen, swipe down from the top of the screen to bring up options.
-
Tap the gear icon at the top right to open the Settings screen.
-
On the Settings screen, tap Security.
-
Under Security settings, confirm the following:
-
Open Device admin (or Device admin apps, depending on Android version).
-
Verify that Perfecto App is enabled.
-
-
On the Settings screen, tap Display.
-
Under Display settings, confirm or set the following:
-
Dark, if available
-
Minimum Brightness (slider is on the left)
-
Adaptive brightness turned off
-
Motion smoothness set to Standard
-
Screen mode set to Natural
-
-
Set the screen resolution:
-
Tap Screen resolution.
-
Under Screen resolution, select the highest possible option (usually WQHD+) and tap Apply.
-
Tap the back button.
-
-
Back on the Display screen, tap Screen timeout.
-
On the Screen timeout screen, select the longest time available to prevent the device from going into error due to inaction on the screen.
-
Tap the back button twice to return to the main Settings screen.
-
Under Battery Settings, confirm that the following settings are turned off:
-
Power Saving
-
Battery Protection
-
-
On the Settings screen, scroll down and tap About phone.
-
Under About phone, tap Software information.
-
Under Software information, find the Build number and tap it 7-10 times in quick succession. You should get a message saying "Developer Options has been enabled."
-
Tap the back button twice to return to the main Settings screen.
-
On the Settings screen, scroll down and tap Developer options.
-
Under Developer options, do the following:
-
Turn on Stay awake
-
Turn off Auto update system
-
Turn on USB debugging
When prompted for confirmation, tap OK.
-
Turn on Disable adb authorization timeout
-
Turn off Verify apps over USB
-
Set USB parameters:
-
Tap Default USB configuration.
-
Under USB settings, select Transferring files / Android Auto. If this option isn't available, select MTP.
-
Click the back button to return to the Developer options screen.
-
-
(Optional) If you need to optimize performance or mitigate heavy load, consider using 0.5x animation scale settings.
When running Appium tests, use Appium's
disableWindowAnimationcapability instead. This capability handles disabling animations during tests and restores them afterward. For example:capabilities.setCapability("disableWindowAnimation", true);For more information, see Appium's Capabilities documentation.
-
Turn off Windows animation scale
-
Turn off Transition animation scale
-
Turn off Animator duration scale
-
- Tap the home button to return to the home screen.
Connect an Android device to the cloud
Perform the following steps to connect an Android device to the cloud.
-
When the Android device is set up and ready to go, get a USB-A to USB-C/USB-Micro-B cable.
-
Plug the USB-A connector into the HSS and the other end with the appropriate connector into the device.
-
On the device, wait until you see the RSA popup window. Then select Always allow debugging from this computer and tap OK.
-
Confirm any other popup windows.
-
Make sure the USB connection type is set to file transfer.
-
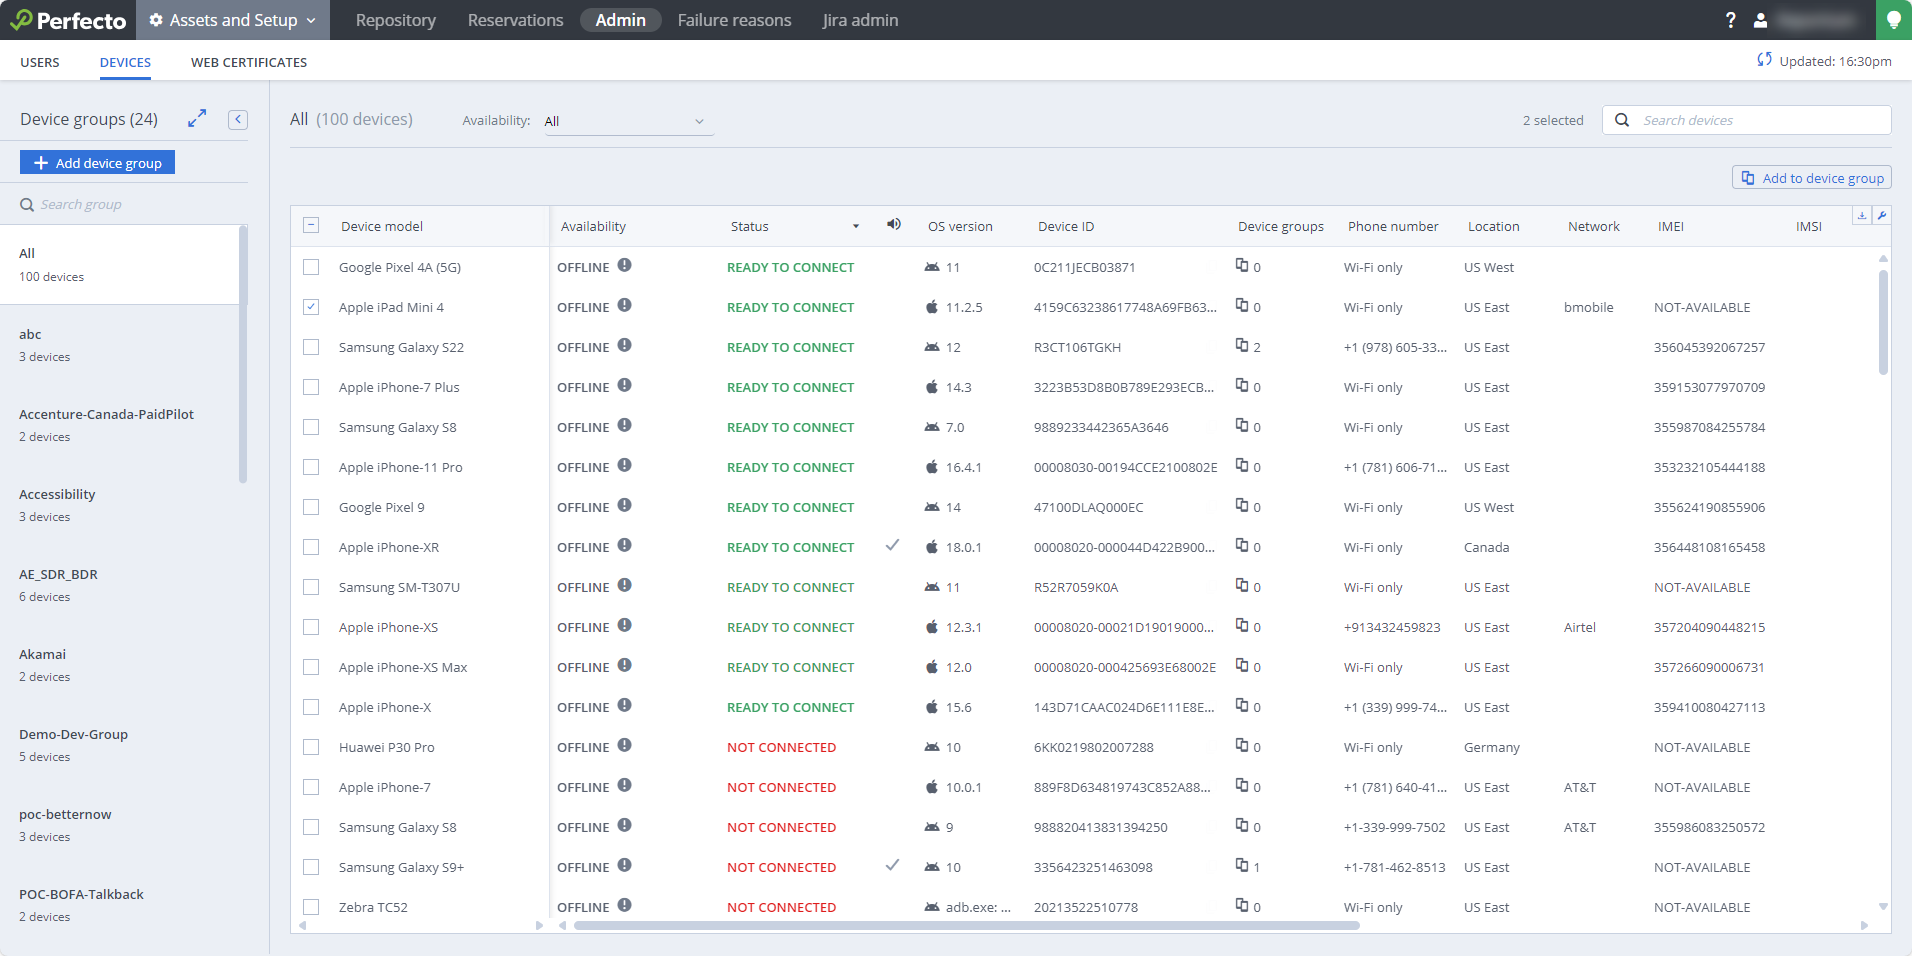
In the Perfecto UI, go to Assets and Setup > Admin > Devices tab.
On the Devices tab, the device should show up with a status of Ready to connect.
-
If there are too many devices to show on a single screen, use the search box to filter for devices in the Ready to connect state.
-
If, after 5-10 minutes, the device doesn't show up in the cloud, do the following:
-
Unplug the device, restart it, and check all settings.
-
Plug the device back in and wait another 5-10 minutes.
-
If the device still doesn't show up, replace the cable.
-
If replacing the cable doesn't help, restart the HSS.
-
To be able to perform these steps in Perfecto, you need to be a lab admin user. To learn more about connecting devices, see Device management.
-
On the Devices tab, select the device you want to connect.
-
On the toolbar, click the Connect button.
-
Verify the Device Model matches the device you want to connect.
-
If the Device ID or Device Number does not match the device you want to connect, select the correct device model from the menu.
-
-
In the Select template panel, make sure the selections are correct. Pay special attention to the Distributor. This is the template for the device. General is the correct template for most devices. If the device isn't able to connect with the General template, use the Screencopy template.
-
Click Next.
-
In the Update device properties panel, provide the following information:
-
Phone number: A phone number must start with "+" and include a country code and a phone number. It may contain a set of "()".
-
Language: The device language.
-
Operator Country: The desired country.
-
Sim Operator: The SIM operator based on the selected operator country.
-
Description: Up to 25 characters.
-
-
Click Next.
-
In the Update groups panel, select any group/groups from the Available groups list and click the arrow
 button to add it to the Selected groups list.
 -
Click Next.
-
In the Finish panel, click Finish and Open Device to view your device in the device list.
The device now shows a status of Connected. It should be ready to use.