Perform the following steps to set up and connect iOS devices to your hybrid cloud. These steps may vary between device model, carrier, and OS version.
To be able to connect devices in Perfecto, you need a user with lab admin privileges. To learn more, see Device management.
To avoid test disruption in hybrid clouds after upgrading devices to iOS 17, on the device, under Settings > General > Airdrop, make sure that the Bringing Devices Together toggle is turned off. The following instructions include this step.
Set up an iOS device
Perform the following steps to set up an iOS device.
-
Turn the device on and wait for the message “Hello” in different languages.
-
Swipe up from the bottom of the screen and select the language and country.
-
On the Quick Start screen, tap Set Up Manually.
-
During manual setup, do the following:
-
On the Choose a Wi-Fi Network screen, log in to the appropriate Wi-Fi network.
Depending on your testing environment, you might have an open Wi-Fi network and a closed WiFi network. The closed Wi-Fi network is generally used in testing environments for content, URL filtering, and blocking update servers. When you first set up iOS devices, they usually need to be on an open Wi-Fi network because there will be several stock Apple apps that you need to download.
-
If a trust certificate popup window appears, tap Trust.
After logging into the appropriate Wi-Fi network, the device will need a moment to load.
-
On the Data & Privacy screen, tap Continue.
-
On the Face ID screen, tap Set Up Later in Settings.
-
On the Create a Passcode screen, tap Passcode Options > Don't Use Passcode.
-
In the popup window that appears, confirm your selection by tapping Don't Use Passcode.
-
On the Apps & Data screen, tap Don’t Transfer Apps & Data.
-
On the Apple ID screen, tap Forgot passcode or don’t have an Apple ID?. Then tap Set Up Later in Settings and confirm by tapping Don't Use.
-
On the Terms and Conditions screen, tap Agree.
-
On the Express Settings screen, tap Customize Settings.
-
On the Keep Your iPhone Up to Date screen, tap Continue.
-
On the iMessage & FaceTime screen, tap Not Now.
-
On the Location Services screen, tap Enable Location Services.
-
On the Siri screen, tap Set Up Later in Settings.
-
On the Screen Time screen, tab Set Up Later in Settings.
-
On the iPhone Analytics screen, tap Don’t Share.
-
On the True Tone Display screen, tap Continue.
-
On the Appearance screen, select Dark and then tap Continue.
-
On the Display Zoom screen, select Standard and then tap Continue.
-
-
When the Welcome to iPhone message appears, swipe up from the bottom of the screen.
When complete, the device shows the home screen.
-
Continue with Configure device settings.
-
Open the Settings app.
-
On the Settings screen, do the following:
-
Under Notifications, turn off Amber Alerts, Emergency Alerts, and Public Safety Alerts.
-
Under Battery, turn off the following settings:
-
Battery Health & Charging > Optimized Battery Charging
-
Battery Health & Charging > Clean Energy Charging
-
Power mode > Adaptive Power
-
Power mode > Low Power Mode
-
-
(iOS 17 only) To avoid test disruption after upgrading a device to iOS 17, under General > Airdrop, make sure that the Bringing Devices Together toggle is turned off.
-
Under General > Keyboard, turn off all settings under All keyboards.
-
Under Display and Brightness, do the following:
-
Turn the brightness to the lowest setting by sliding the control to the left.
-
Turn off Auto-Brightness.
-
Tap Auto-Lock and select Never or the longest option available.
The options under Auto-Lock may be different depending on your company’s security policies. Consider setting this to the longest possible setting. The longer the time, the less likely a user will idle on the device for too long and send it into error.
-
-
Under Safari > Advanced, confirm that both JavaScript and Web Inspector are turned on.
-
-
Return to the home screen and confirm that all apps have downloaded on the first and second home screen pages.
-
If any apps are still loading or waiting, tap each of them. This should prompt the device to start downloading these apps.
-
When all apps have downloaded, if your testing environment uses a closed Wi-Fi network, change from the open Wi-Fi network to the closed Wi-Fi network, as follows:
-
On the Settings screen, under Wi-Fi, tap the Wi-Fi network that the device is currently connected to.
-
On the network screen, tap Forget This Network, and then, to confirm, tap Forget.
-
When the device completes processing, tap the network you would like to connect to.
-
Enter the network credentials and click Join.
-
If a trust certificate popup window appears, tap Trust.
-
-
Bring the device to the home screen by swiping up from the bottom or tapping the Home button.
Connect an iOS device to the cloud
Perform the following steps to connect an iOS device to the cloud.
-
When the iOS device is set up and ready to go, get a USB-A cable with Lightning connector.
-
Plug the Lightning connector into the device and the USB-A into a port on the HSS.
The first time you connect this device to this HSS, a Trust This Computer? popup message appears.
-
Tap Trust.
-
In the Perfecto UI, go to Assets and Setup > Admin > Devices tab.
On the Devices tab, the device should show up with a status of Ready to connect.
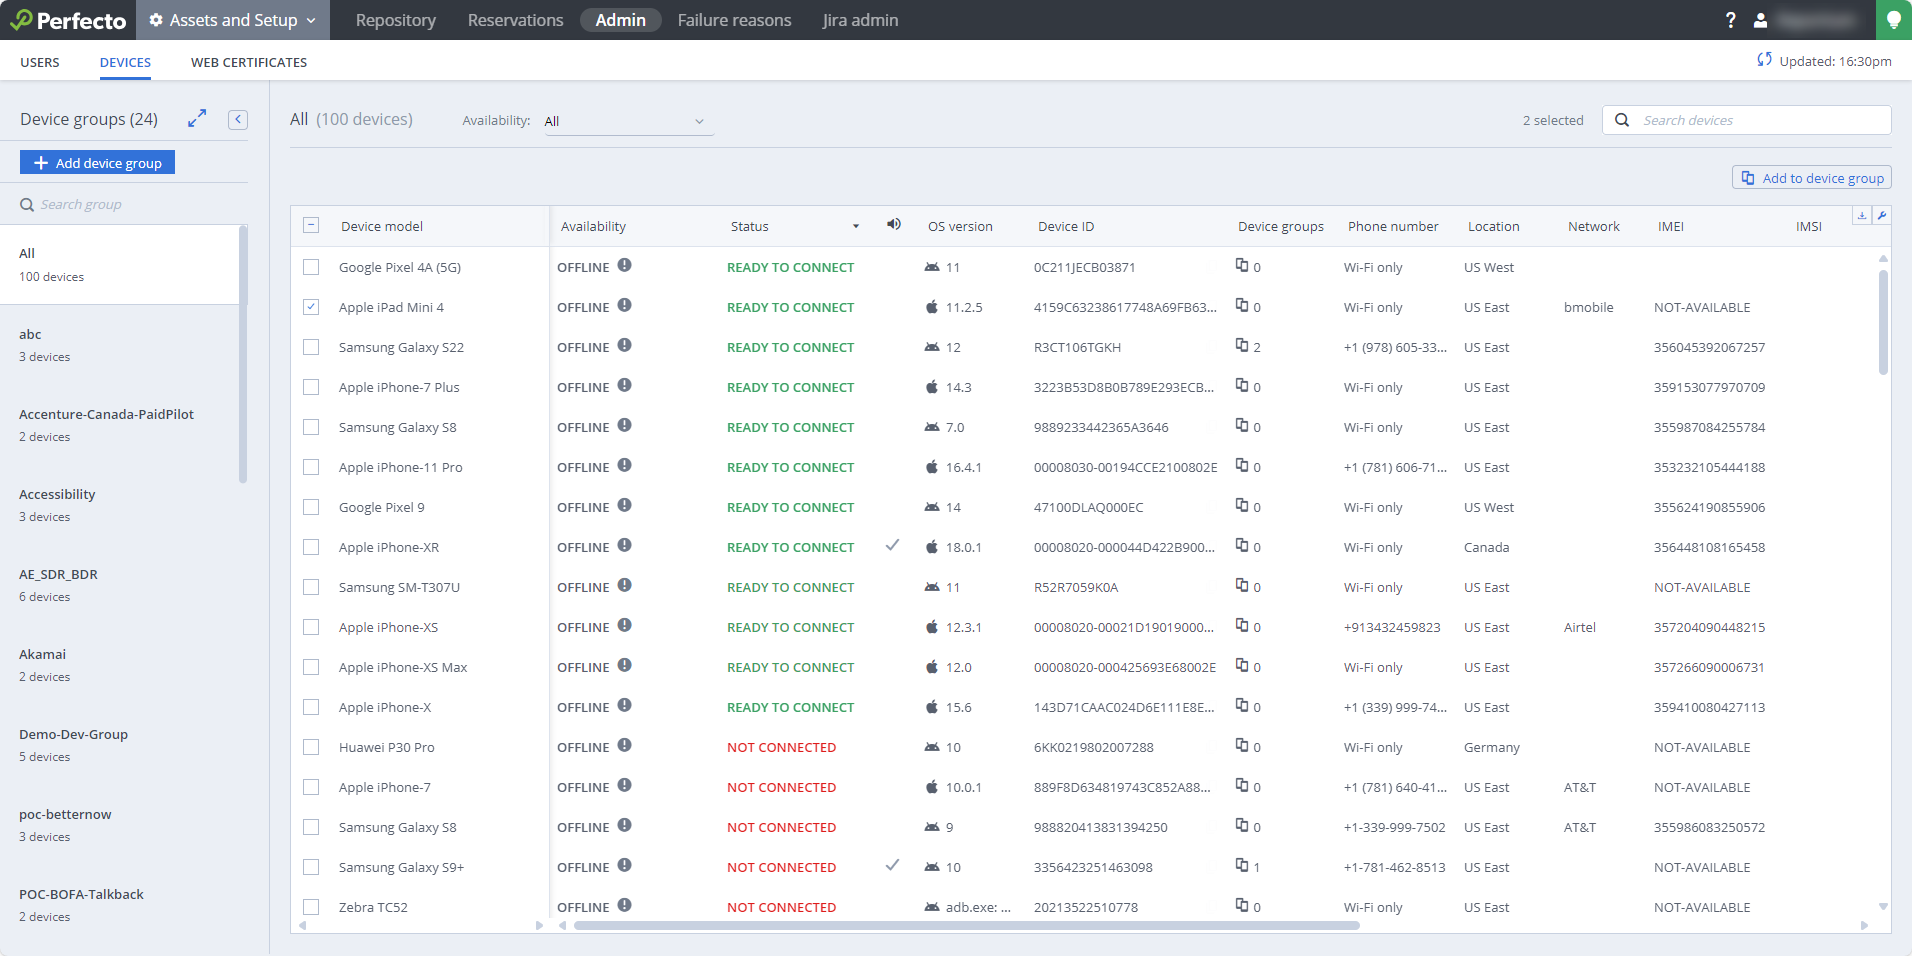
-
If there are too many devices to show on a single screen, use the search field to filter for devices in the Ready to connect state.
-
If, after 5-10 minutes, the device doesn't show up in the cloud, do the following:
-
Unplug the device, restart it, and check all settings.
-
Plug the device back in and wait another 5-10 minutes.
-
If the device still doesn't show up, replace the cable.
-
If replacing the cable doesn't help, restart the HSS.
-
When the device has a status of Ready to connect, provisioning is required before you can transition the device to Connected.
To provision the device:
Open a ticket with Perfecto Support, requesting to provision the device. As part of the request, provide the Device ID, also known as the UDID (Unique Device Identifier).
You can find this information on the Devices tab, in the Device ID column.
-
Confirm that the device:
-
Is turned on, unlocked, and on the home screen.
-
Still has a status of Ready to connect in the cloud (on the Devices tab).
-
-
On the Devices tab, select the device you want to connect.
-
On the toolbar, click the Connect button.
-
In the Select template panel, make sure the selections are correct. Pay special attention to the Distributor. This is the template for the device, and it must match the current iOS version. For example, if the device is on iOS 14.6, select the IOS14 template.
-
Click Next.
-
In the Update device properties panel, provide the following information:
-
Phone number: A phone number must start with "+" and include a country code and a phone number. It may contain a set of "()".
-
Language: The device language.
-
Operator Country: The desired country.
-
Sim Operator: The SIM operator based on the selected operator country.
-
Description: Up to 25 characters.
-
-
Click Next.
-
In the Update groups panel, select any group/groups from the Available groups list and click the arrow
 button to add it to the Selected groups list.
 -
Click Next.
-
In the Finish panel, click Finish and Open Device to view your device in the device list.
The device now shows a status of Connected. It should be ready to use.